- Overview
- Latest Release Notes
- Historical Release Notes
- About ENCOO RPA Studio
- Product Introduction
- Quick Start
- Create-Edit-Debug-Publish
- Create Flow Project
- Create Activity Project
- New from Template
- Console Flow
- Reference Project
- Project Settings
- Variable
- Parameter
- Import Namespace
- Smart Recording
- Mobile Device Management (Enterprise Edition)
- Debug
- Publish Automation Project
- Version Control
- Extension
- ENCOO Market
- FAQ
- ENCOO Component Library
- ENCOO RPA Robot
- ENCOO RPA Console
- Q&A
- LEGAL NOTICES
本文内容导航
Sequence
Sequences are the smallest type of project. They are suitable to linear processes as they enable you to go from one activity to another seamlessly, and act as a single block activity.
One of the key features of sequences is that they can be reused time and again, as a standalone automation project or as part of a flowchart.
Please note that due to the limitations of Windows Workflow Foundation, whenever you want to copy a large number of activities from one sequence to another, it is recommended to scroll down to the bottom of the editing area beforehand.
Note:
Sequence do not use connecting lines.
Example of a Sequence
Create an example sequence that asks the user for his name and age and then displays his answer to illustrate the sequence. The details are as follows:
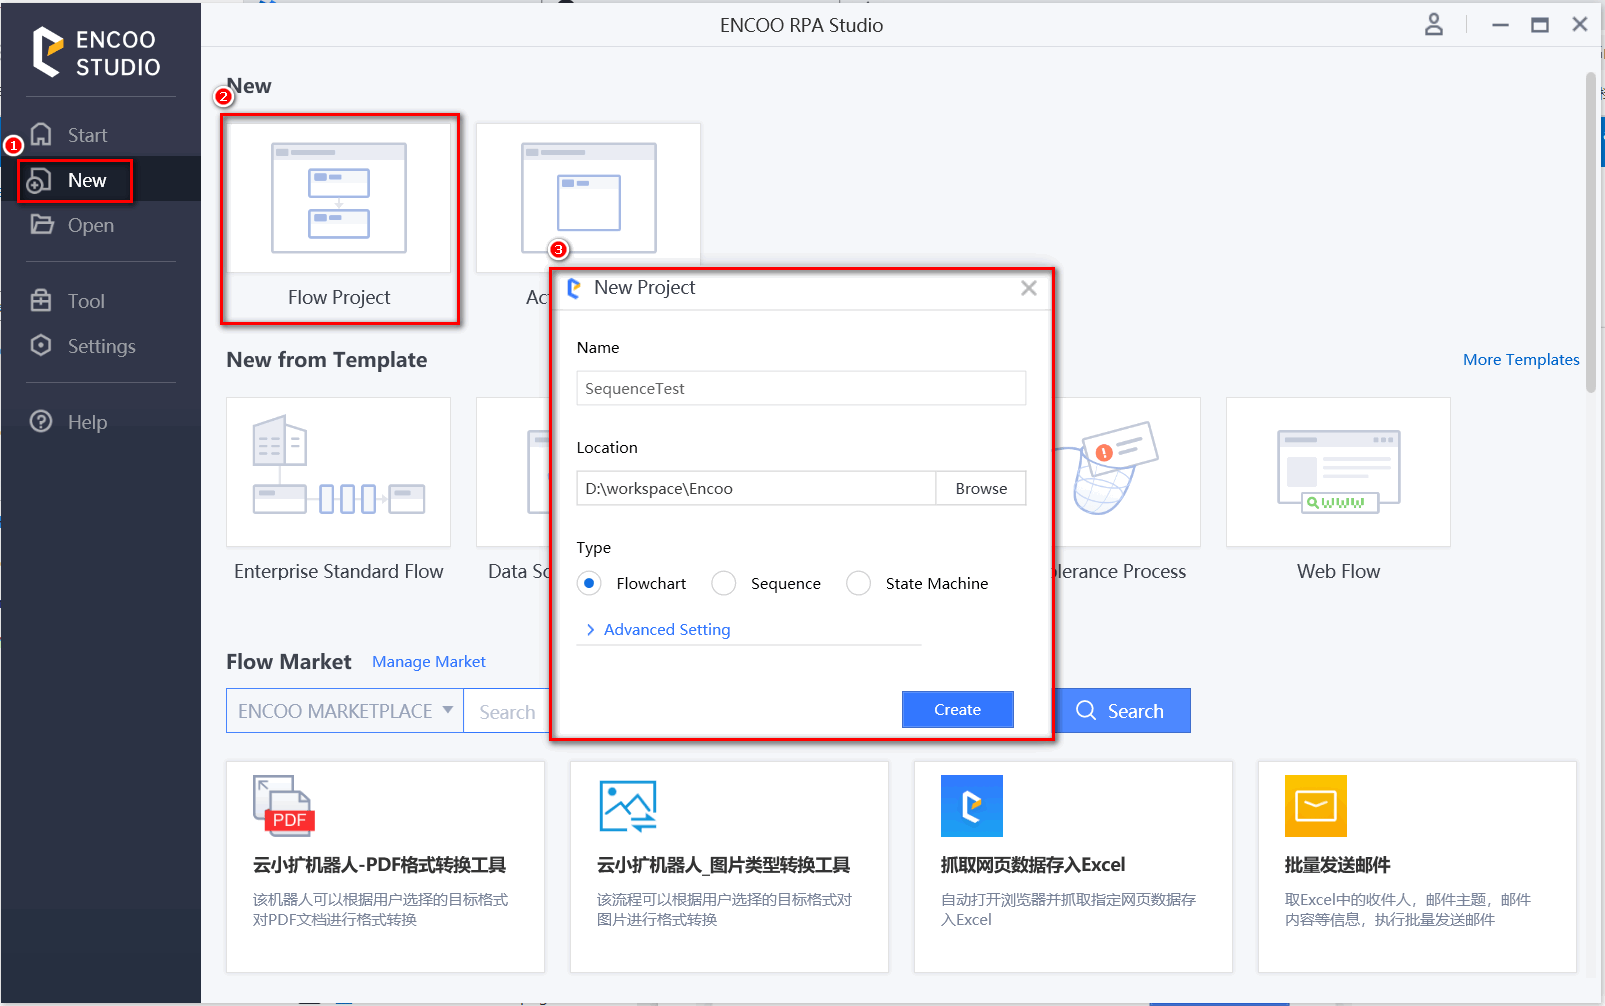
Create a blank automation flow project. Click on "New Flow Project" in the "Start Page" to create a new project and enter a project name, such as "sequenceTest".
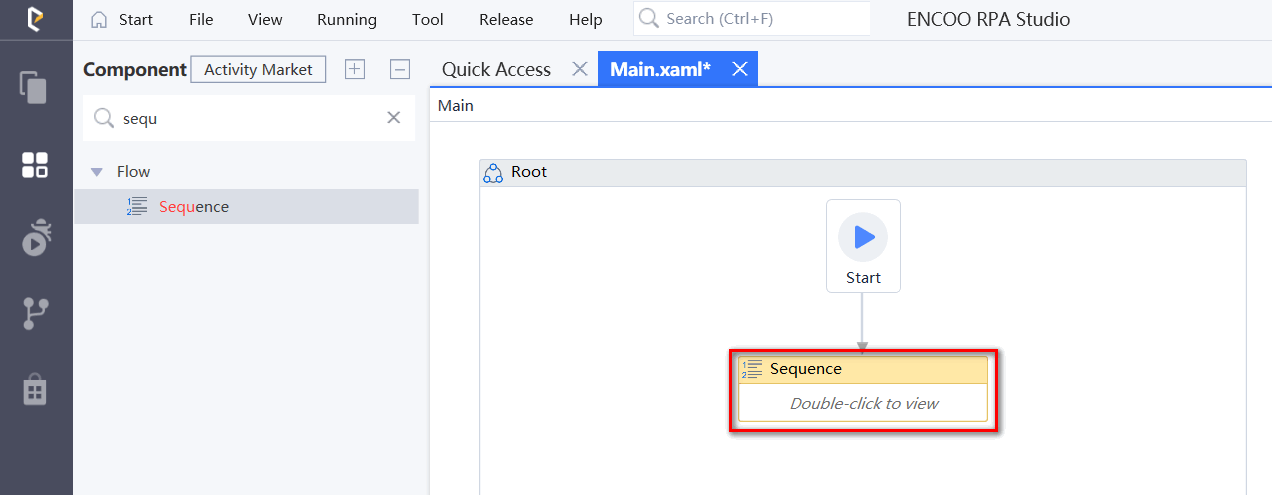
Drag the "Sequence" activity from the activities panel to the editing area
Create two string variables, such as Name and Age, so that you can store data from the user in them. Leave the Default field empty, to indicate that there is no default value.

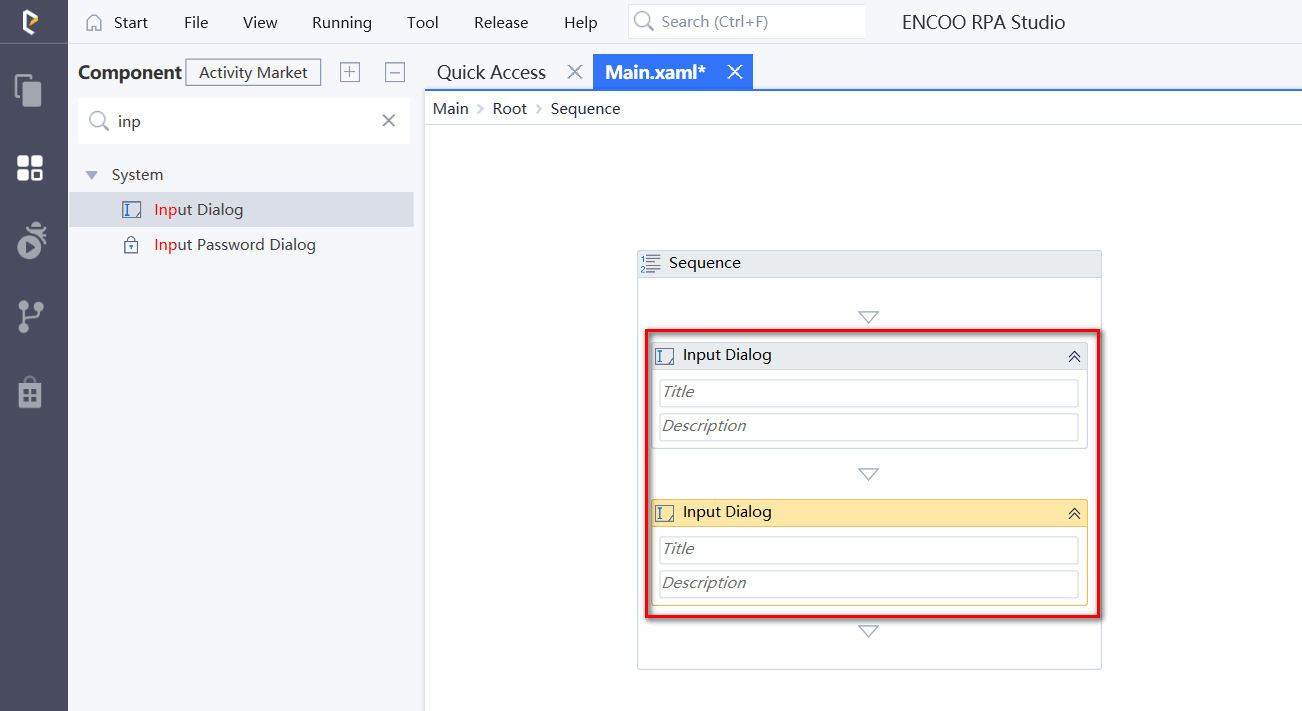
Drag two "Input Dialog" activities to the editing area, one under the other.
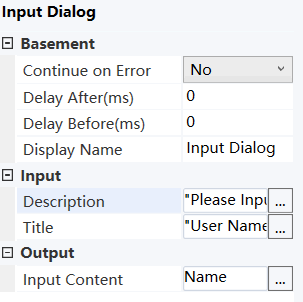
Select the first "Input Dialog" and, in the properties panel, add a description asking for the username, and a custom title.
In the Input Content field, add the Name variable. This indicates that this variable is going to be updated with the value added by the user at this point.
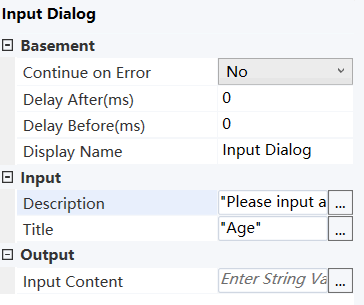
Repeat steps 5-6 for the second "Input Dialog" activity to ask for the user for his age, and store it in the Age variable.
Add a "Confirm Message Box" activity under the second "Input Dialog".
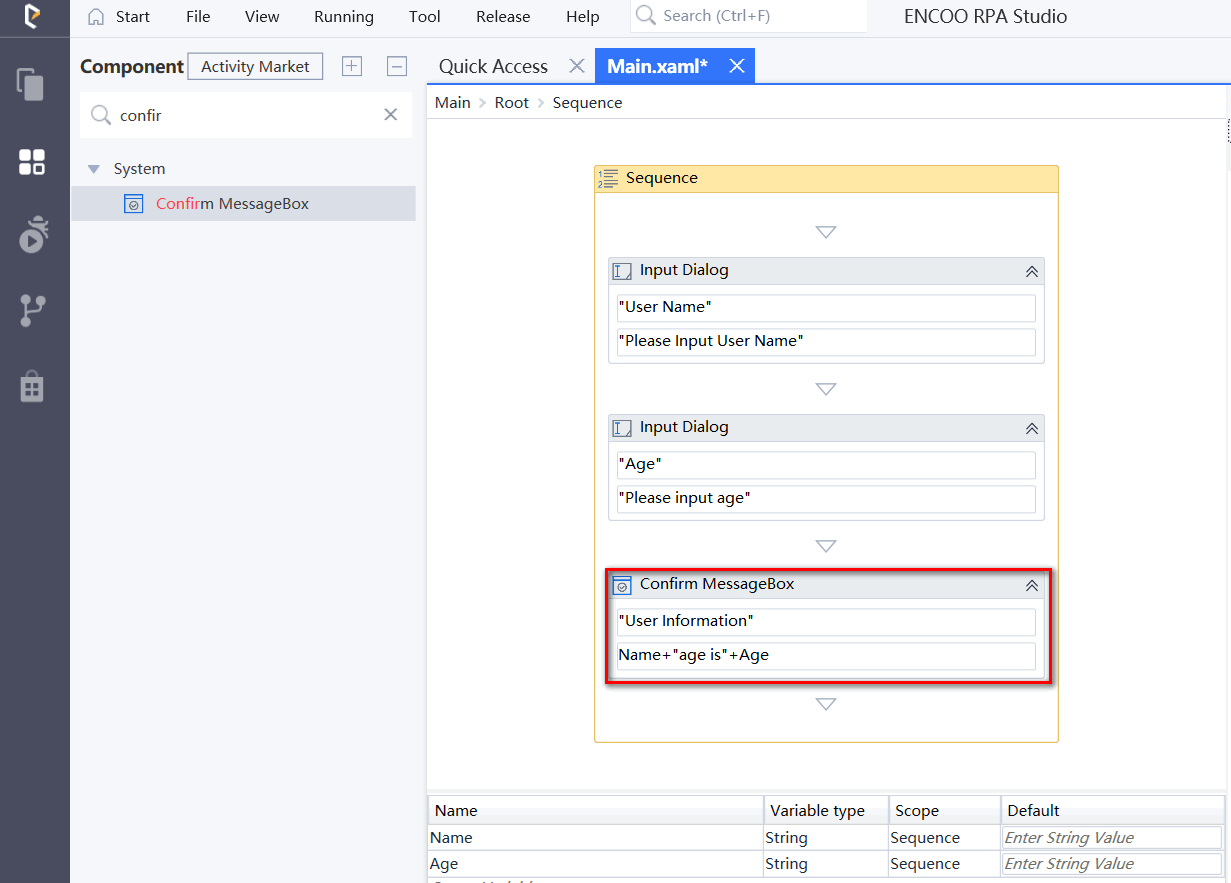
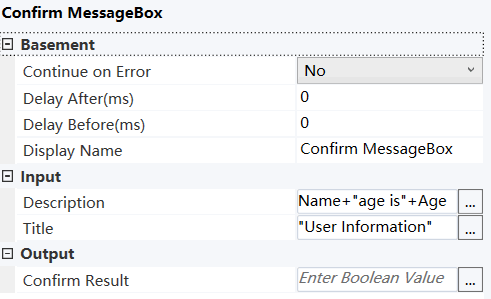
Select the "Confirm Message Box" and, in the properties panel, add the variables and a string to the "Description" field to enable you to display all information gathered from the user, such as Name+" is"+Age+"years old. “ (Optional) The "Title" field can be filled in with "User Information”
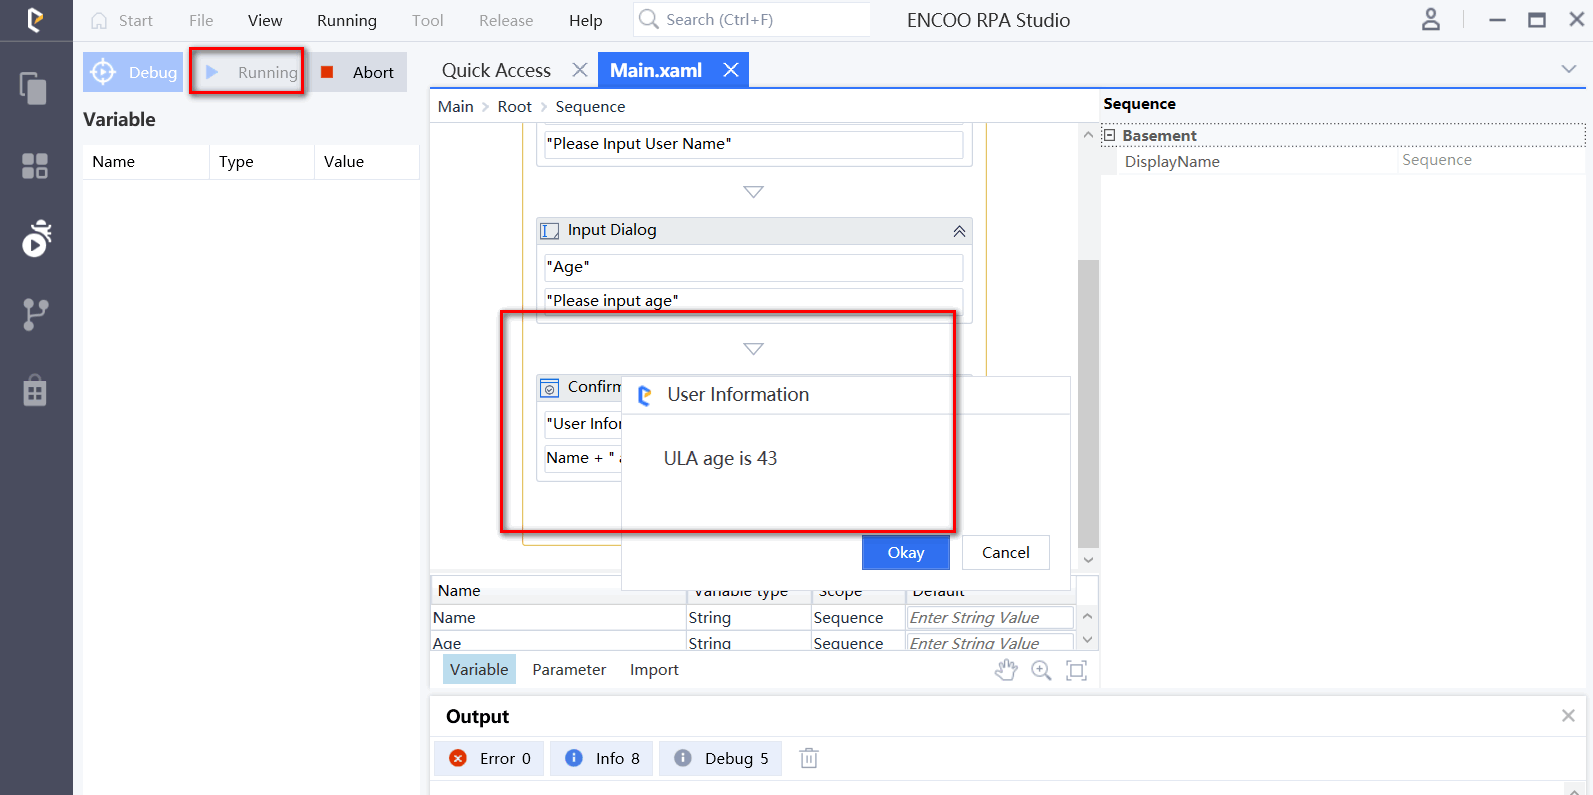
The final sequence is shown below.

Click "Run" in the run panel, type Tewin, 24, and the final result will be shown as Tewin is 24 years old.
