- Overview
- Latest Release Notes
- Historical Release Notes
- About ENCOO RPA Studio
- Product Introduction
- Quick Start
- Version Control
- Extension
- ENCOO Market
- FAQ
- ENCOO Component Library
- ENCOO RPA Robot
- ENCOO RPA Console
- Q&A
- LEGAL NOTICES
本文内容导航
Create Activity Project
Activity Project
An activity project is a project that contains one or more reusable activities. By publishing the project to the activity market, you can install it to other projects as an activity package and use it as a dependency.
Creating an activity project is similar to Create Flow Project. The main difference lies in that the activity project can be referenced in other projects.
After you enable the studio and create an activity project, the project will be stored under the default path -%USERPROFILE%\Documents\Encoo.
Create Flow
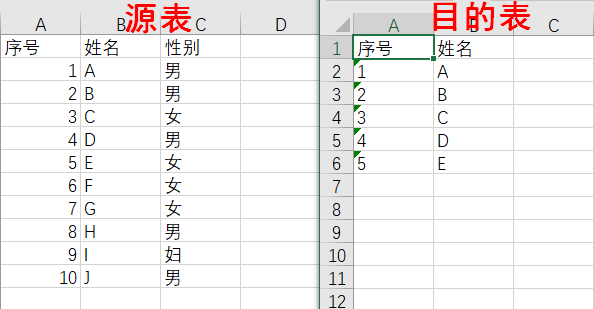
This example will teach you how to create an activity project and publish it to the activity market for use in other projects. We will take some of the data from one Excel file and add it to another Excel file.
Open ENCOO RPA Studio
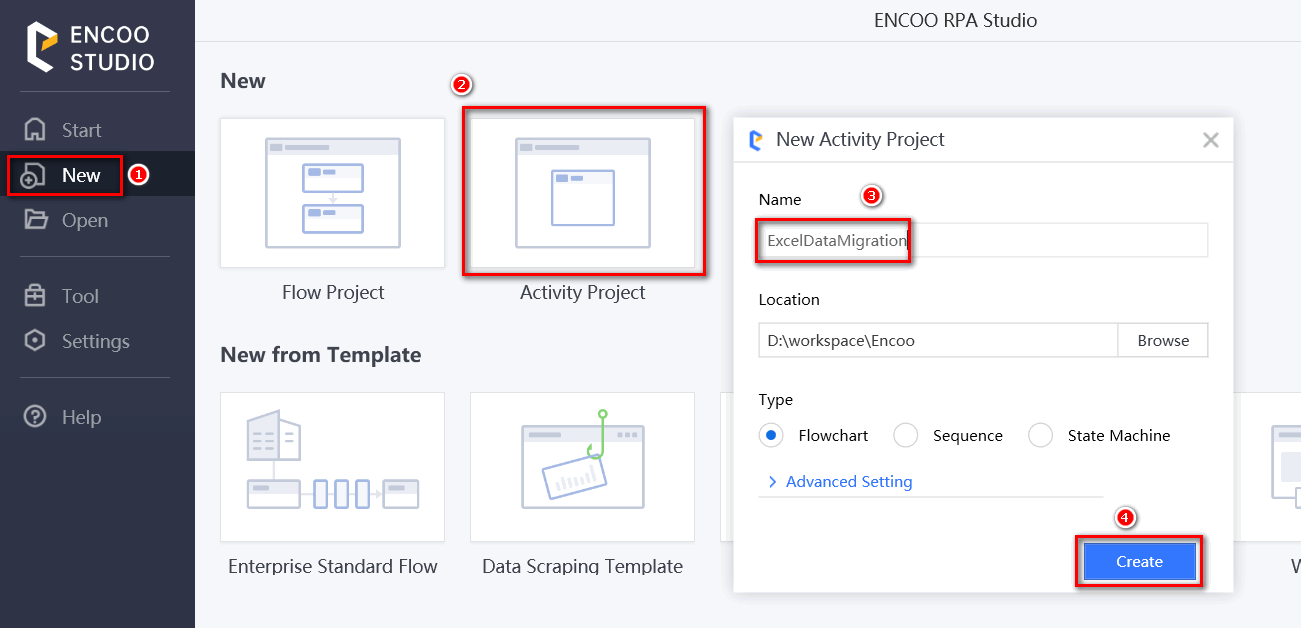
On the Start page, you need to create a new activity project and enter the project name (Take Excel Data Migration as an example). Select the location and set the type. For advanced settings, see Create Flow Project. All default values are used here
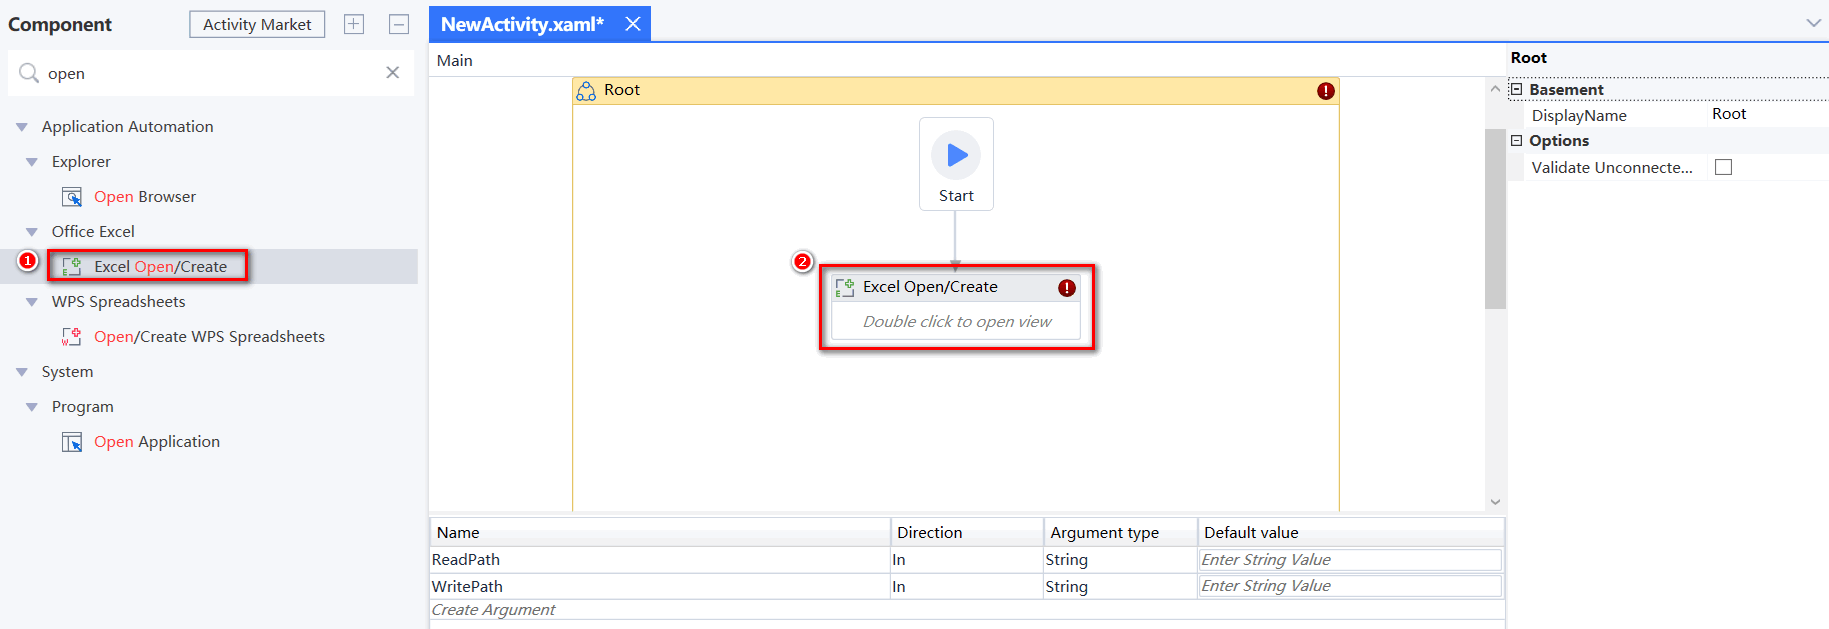
Open the parameter list and create two input variables of string type (String), which will be used as input properties of the published activity.
Read Path -- the path to the Excel file where the data is to be read
Write Path -- the path to the Excel file where the data is to be written

Search for the "Open/New" activity in the activities panel and drag it into the editing area to connect to the Start node
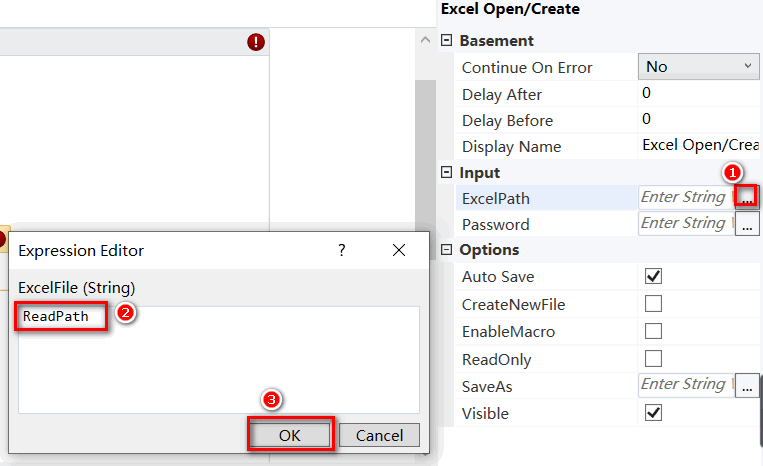
In the properties panel of the activity, enter the following content.
File path: Read path
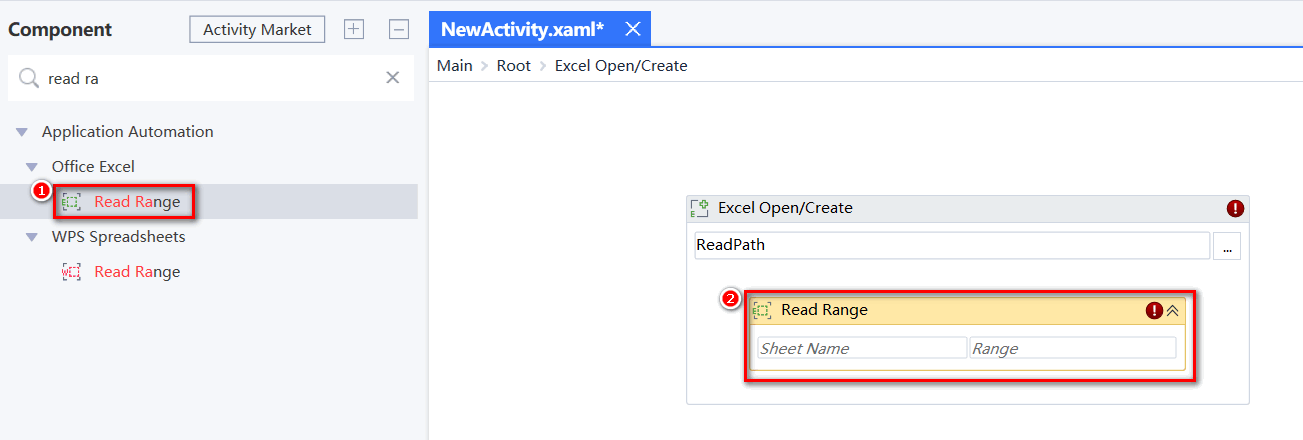
Search for the "Read Range" activity in the activities panel and drag it into the "Open/New" activity
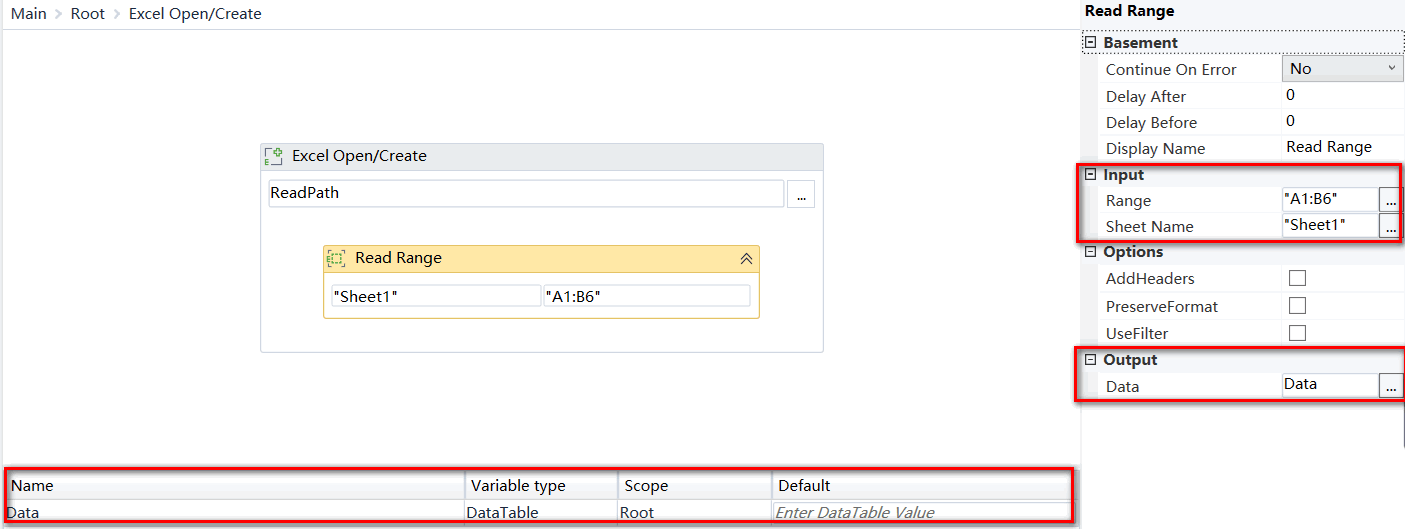
In the properties panel of the activity, enter the following content.
Worksheet: "Sheet1" - the name of the worksheet from which the data is to be read (Take the default name Sheet1 as an example)
Range: "A1: B6" - the range to be read
Data: Data - click on the input box after the field, enter Data as the variable name, select Data all and use the shortcut Ctrl+B to create the variable
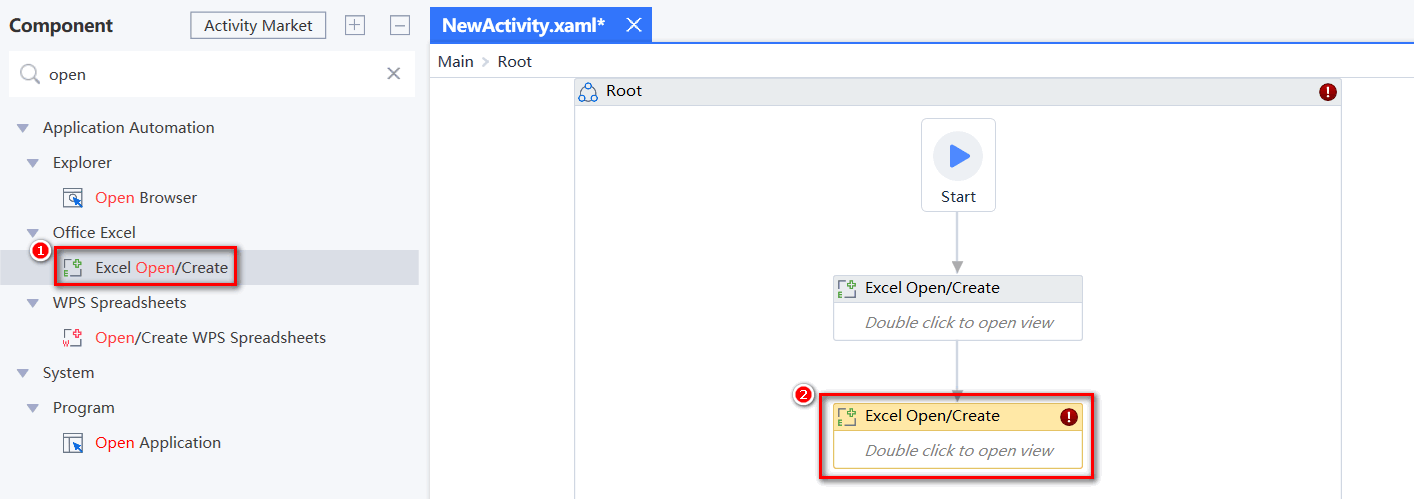
Drag in another "Open/New" activity from the activities panel and connect it to the previous "Open/New" activity
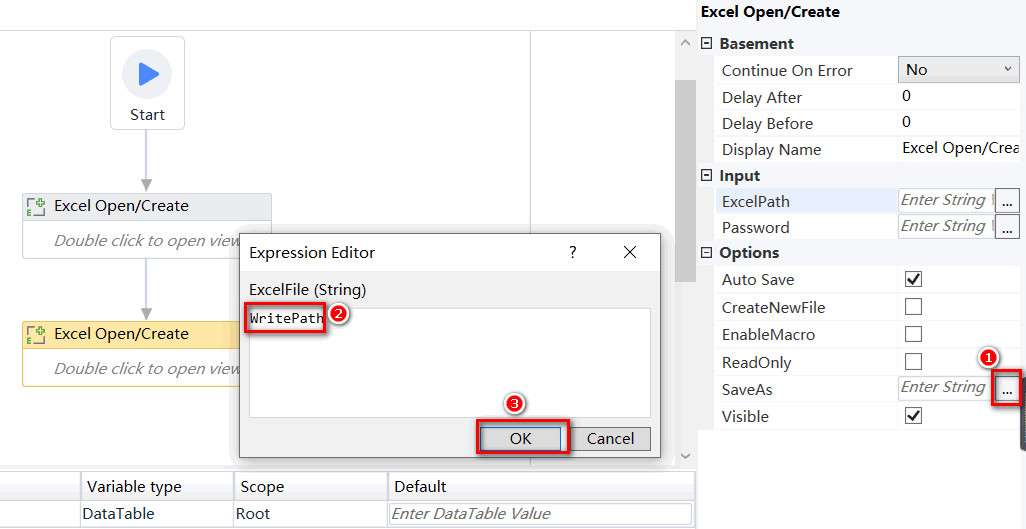
In the properties panel of the activity, enter the following content.
- File path: Write path
Search for the "Write Range" activity in the activities panel and drag it into the second "Open/New" activity
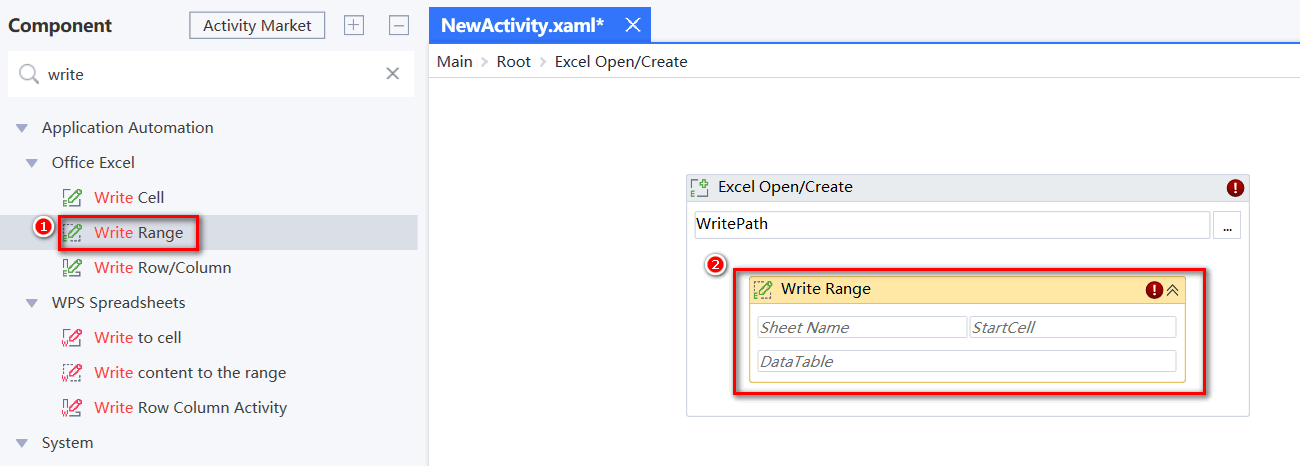
In the properties panel of the activity, enter the following content.
- Worksheet: "Sheet1" - the name of the worksheet where the data is to be written (Take the default name Sheet1 as an example)
- Starting cell: "A1"
- Data table: Data

Run Flow
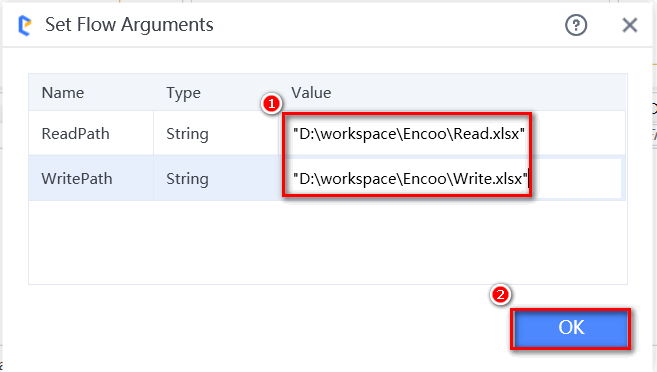
Click on "Run" or use the shortcut Ctrl+F6 to try to run the flow
Set the default values for the parameters and confirm them. Then a portion of the data will be read from the first Excel file and be filled into the second Excel file.
Publish Activity Project
If you want to add this project as a reusable activity to other automation projects, you need to package it and publish it to the activity market.
Open Activity Project Created
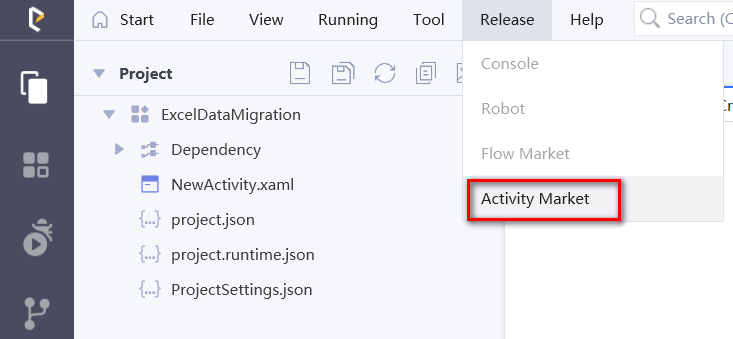
In the menu bar, click on "Publish to Activity Market" to open the Publish window
- Select the target market that you want to publish it to. If there is no market, you can create one by clicking on "Manage Market". For more information on how to create a market, please see Manage Market
- In the Latest Version Number field, you can set the version number of the current project published
- In the Description field, you can add details about this activity project
Export Activity Project
If you need to export the activity project for other projects to refer to, you can select and right-click the project and select "Export Project". In the pop-up "Export Project" dialog box, select the relevant configuration to export as needed.
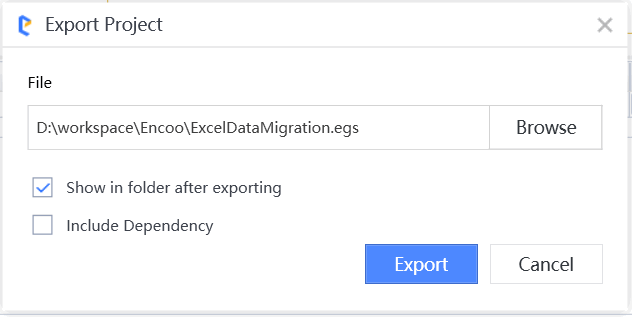
Description: The exported activity project has the extension ".egs", which is different from the flow projects with the extension ".dgs".
Install and Use Activity
If you want to use the activity package in another automation project, you need to install it first and then add it as a dependency of the automation project.
For information about how to create a flow project, see Create Flow Project
In the activities panel, click "activity Market" to open the activity market window
Select the previously created market on the left side of the window. Search for the published activity package and select it. In our example, the activity package is called Excel Data Migration
Click "Install" and close the window when installation is complete. At this point, the activity package has been added to the current flow project and is visible in the activities panel
From the activities panel, drag the "Excel Data Migration" activity into the editing area and connect it to the Start node
In the properties panel of the activity, enter the following content.
- Read path: "C:\Users\Username\Documents\Encoo\Activities Edited Using the Activity Project\start.xlsx" -- the full path to the Excel file where the data is to be read
Write path: "C:\Users\Username\Documents\Encoo\Activities Edited Using the Activity Project\final.xlsx" - the full path to the Excel file where the data will be written
Note:
If the activity contains a path class property, you cannot use relative paths and must use full paths.
- Click "Run" to migrate some of the data from start.xlsx to final.xlsx
