- Overview
- Latest Release Notes
- Historical Release Notes
- ENCOO RPA Studio
- ENCOO Component Library
- ENCOO RPA Robot
- About ENCOO RPA Console
- About ENCOO RPA Console
- User Login
- Home
- Dashboard
- Flow Package Management
- Scheduling Queue
- Flow Deployment
- Job Records
- Global Management
- Application Management
- Data Center
- Document Understanding
- Cancel Account
- Q&A
- LEGAL NOTICES
本文内容导航
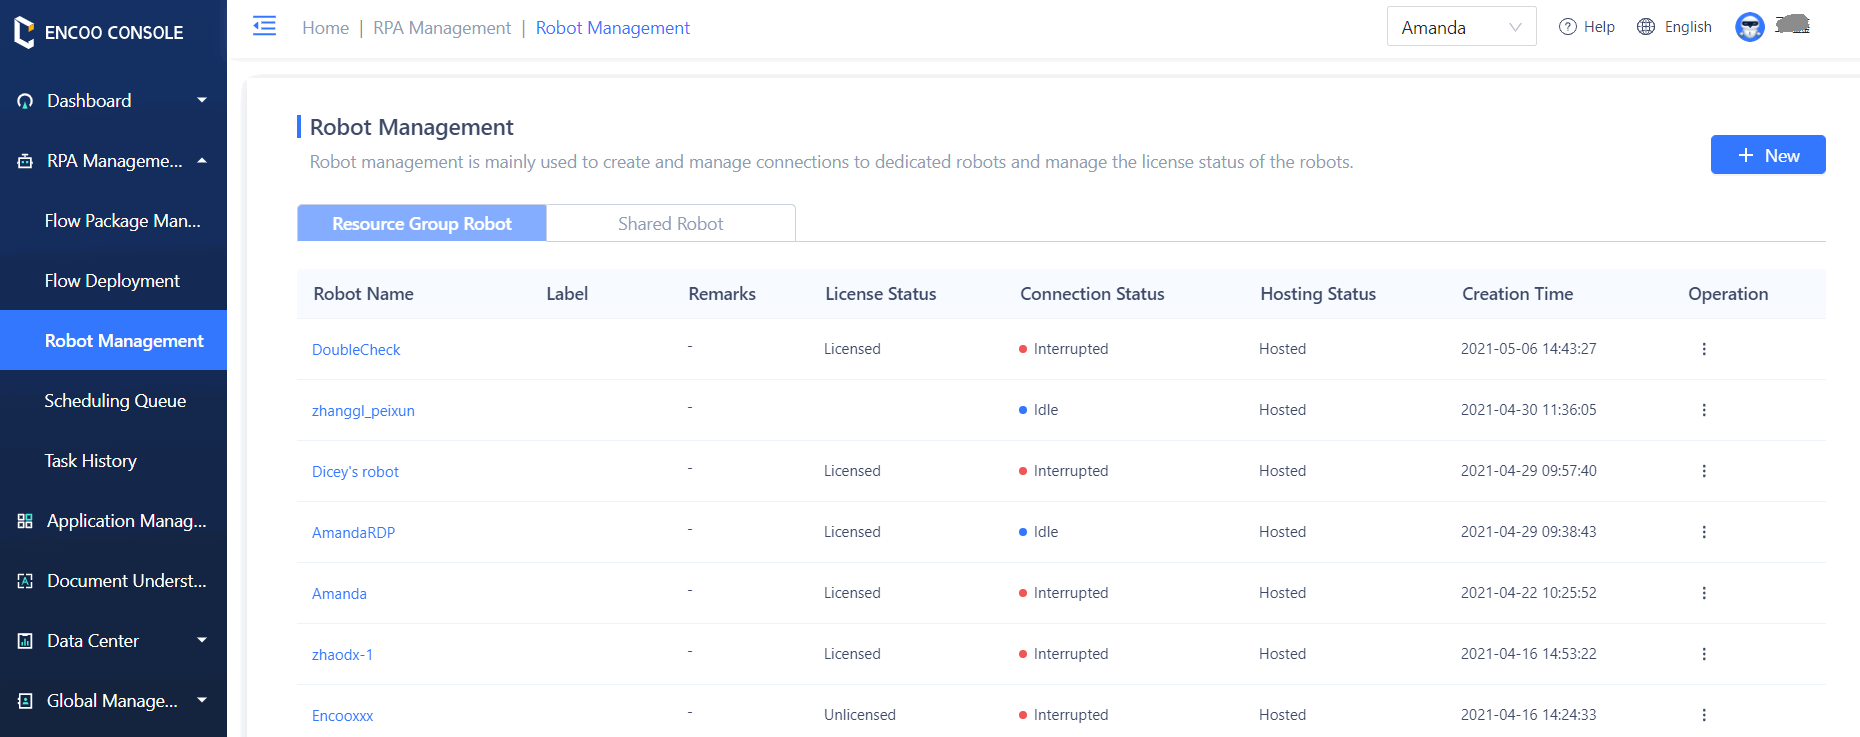
View Robot List
Enter Robot Management and you can see all the robots in the current resource group. You can choose to switch the Resource Group to view the robots in different resource groups.
Add Robot
Click the New button to open the Add dialog box. Fill in the robot name, tags, notes, and select the robot type, and then click OK to create a new robot.
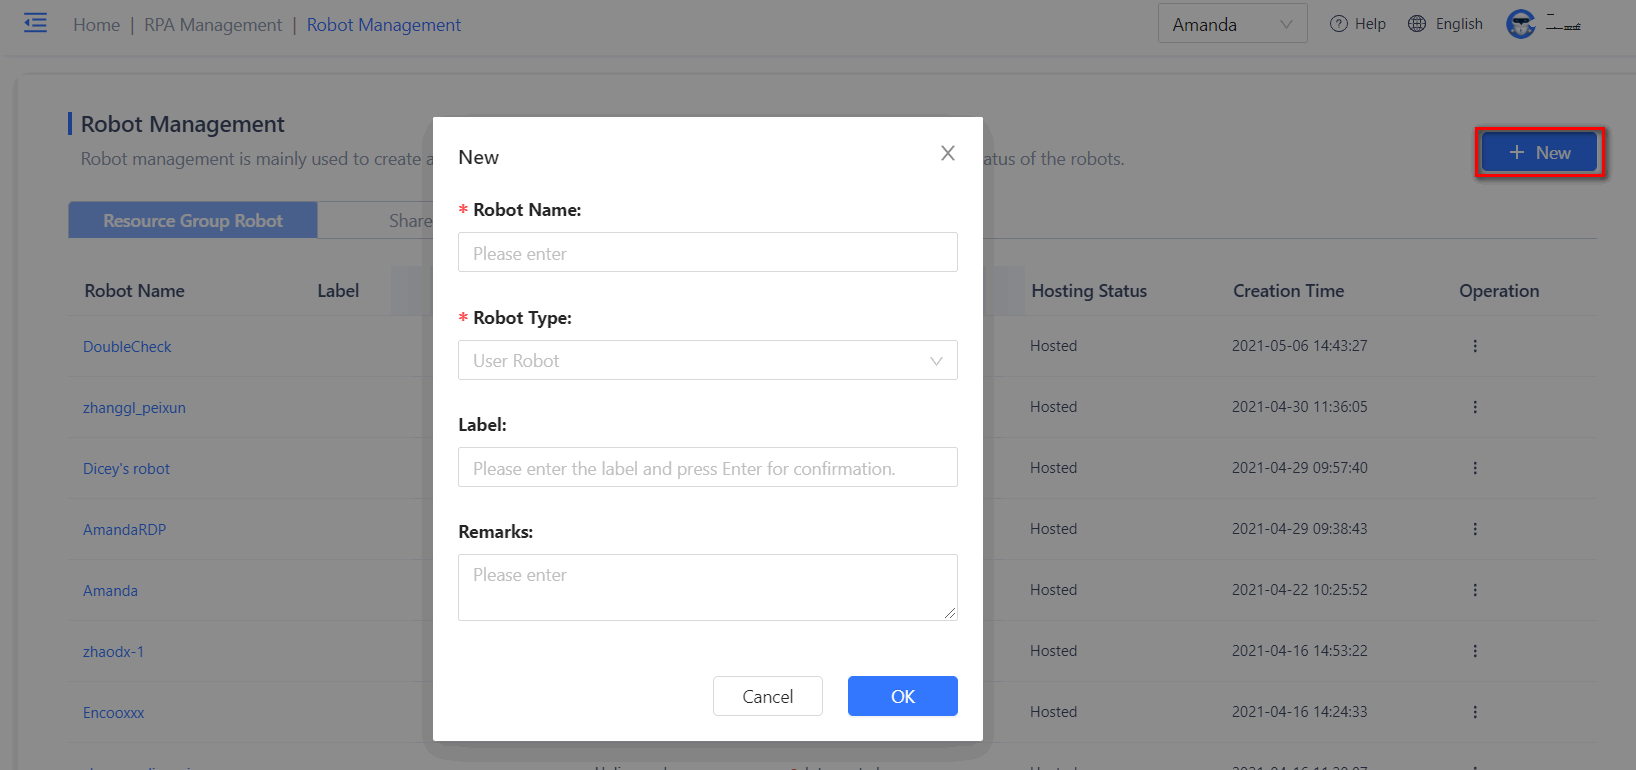
After a robot is successfully added, the system will automatically copy your robot connection string. You can paste the robot connection string directly to the client robot to complete the activation. For more information, see: Activate Robot
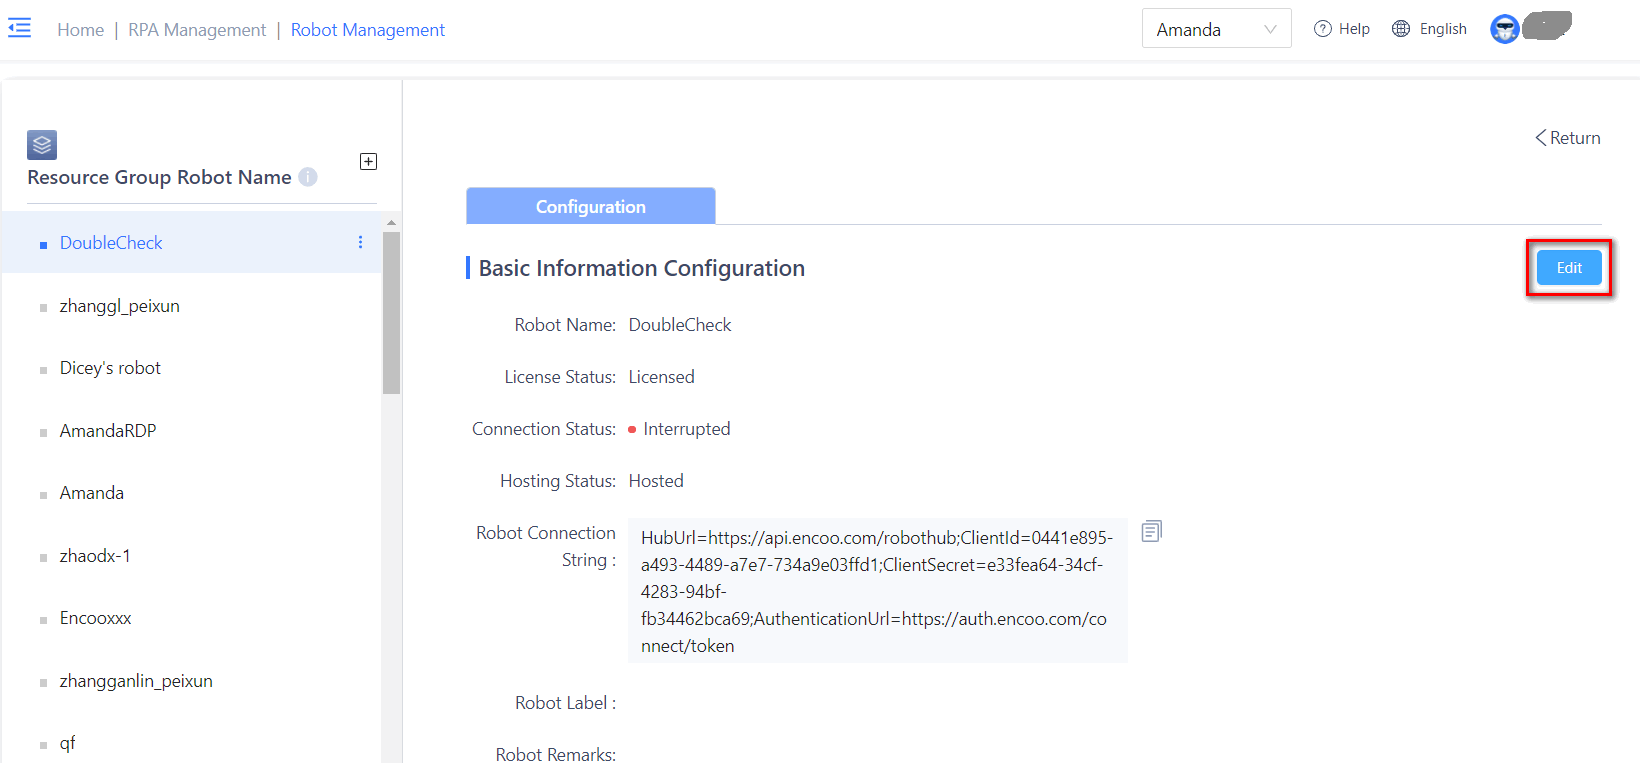
View Robot Information
Click on the corresponding robot name to view robot details

Edit Robot Information
Click the Edit button on the robot details page to start editing the robot information, and click Save after completion of editing.
Click on the corresponding robot name to view robot details

Click the Edit button on the robot details page to start editing the robot information, and click Save after completion of editing
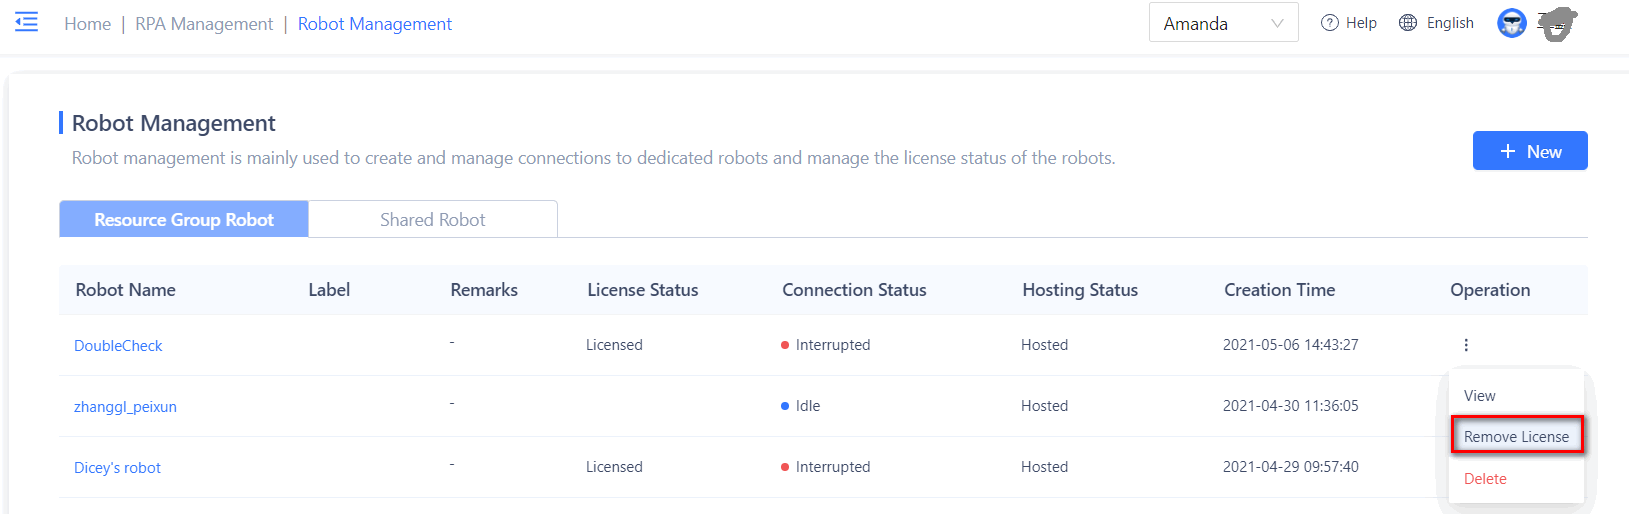
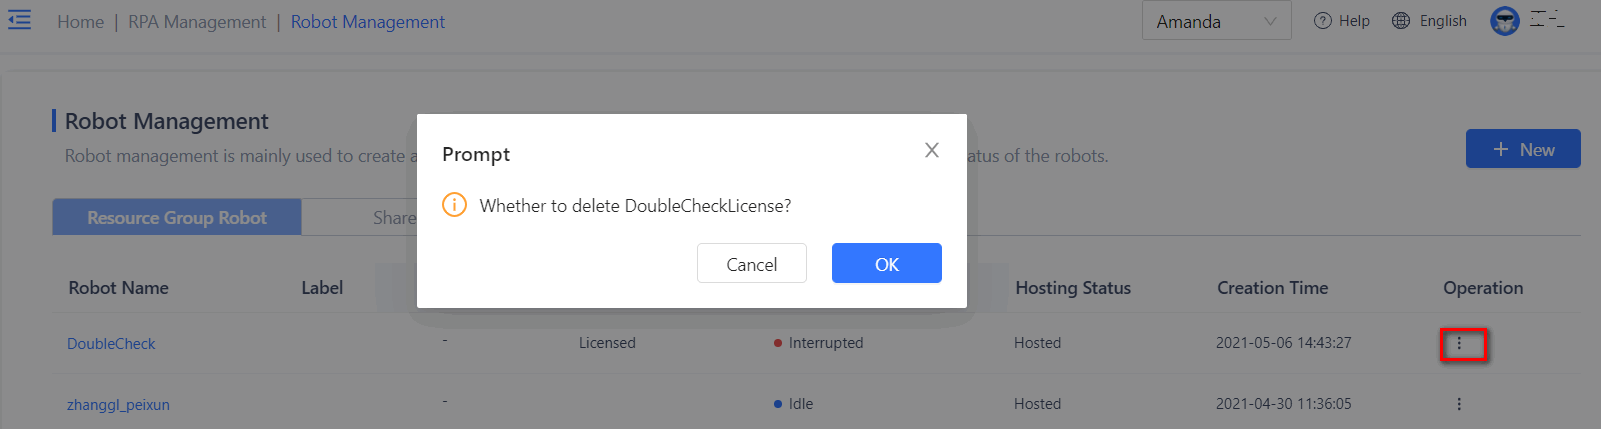
Remove License
A newly created robot has a license by default. If the status of the current robot is Licensed, click the Remove License button in the Actions section to remove the license from the current robot.
Assign License
A newly created robot has a license by default. If the status of the current robot is Licensed, click the Remove License button in the Actions section to remove the license from the current robot.
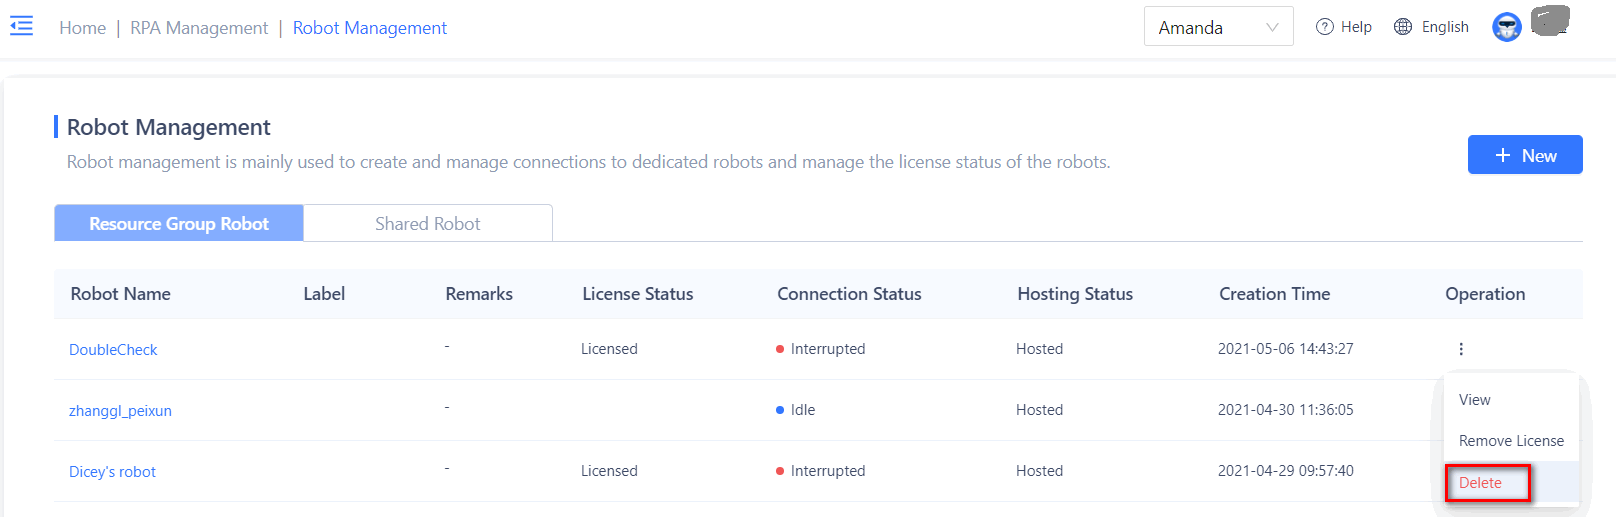
Delete Robot
Find the robot you want to delete and check Actions - Other - Delete. Then click Delete to delete the robot. If a robot wants to be deleted successfully, the following conditions shall be met.
- The status of the robot is Disconnected
- The robot is currently in the execution queue module and there are no queues with the status of Waiting and Executing