- Overview
- Latest Release Notes
- Historical Release Notes
- About ENCOO RPA Studio
- Quick Start
- Project Flow
- Version Control
- Extension
- ENCOO Market
- FAQ
- ENCOO Component Library
- ENCOO RPA Robot
- ENCOO RPA Console
- Q&A
- LEGAL NOTICES
本文内容导航
User Interface
The ENCOO RPA studio features a simple and intuitive layout that maximizes space for the editing area while leaving enough room for browsing the project or the entire context of the project. Its user interface is divided into the following two parts, that is, the start homepage and the studio homepage.
Start Homepage
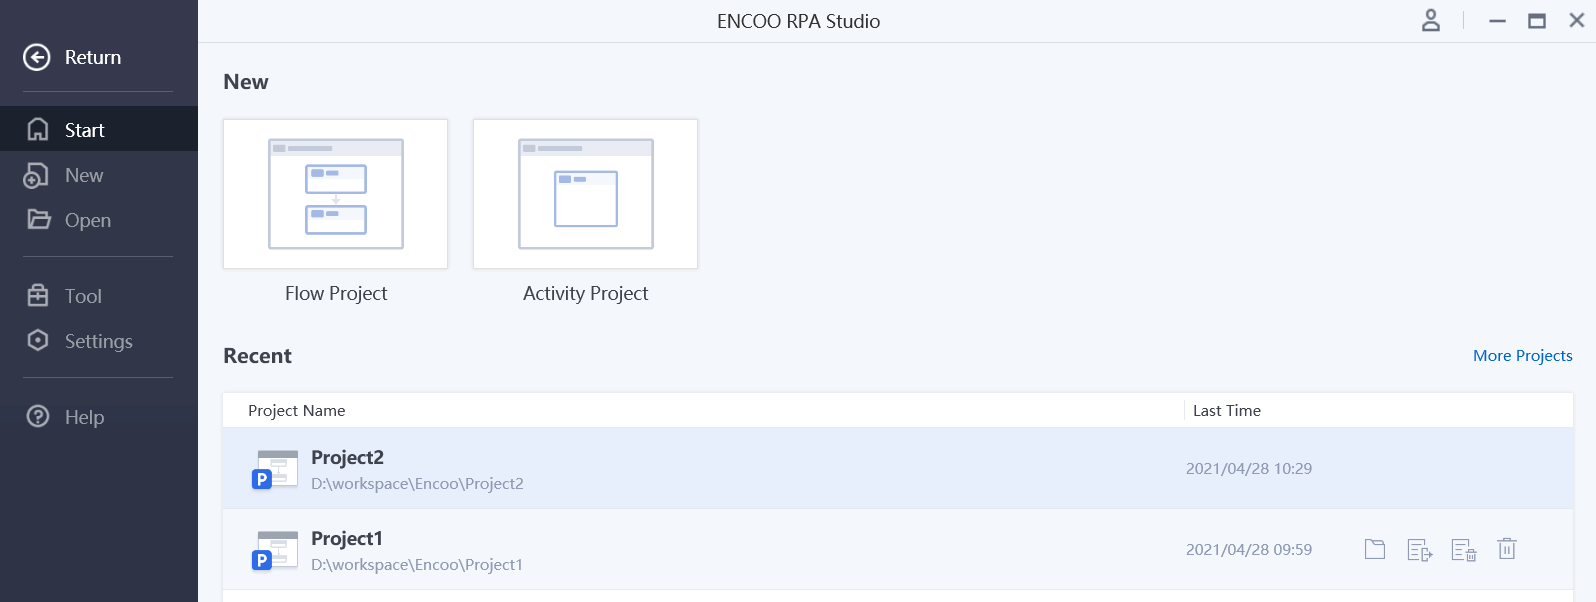
- New - Create a new flow project or activity project.
- Recent - Open the most recent project you have worked on. The operations such as Open Project Folder, Export Project, Delete Project, and Remove From Recent Use List can be performed. Click the More Projects link to view more recently processed projects, and you can fuzzy search the Recent Use list.
New
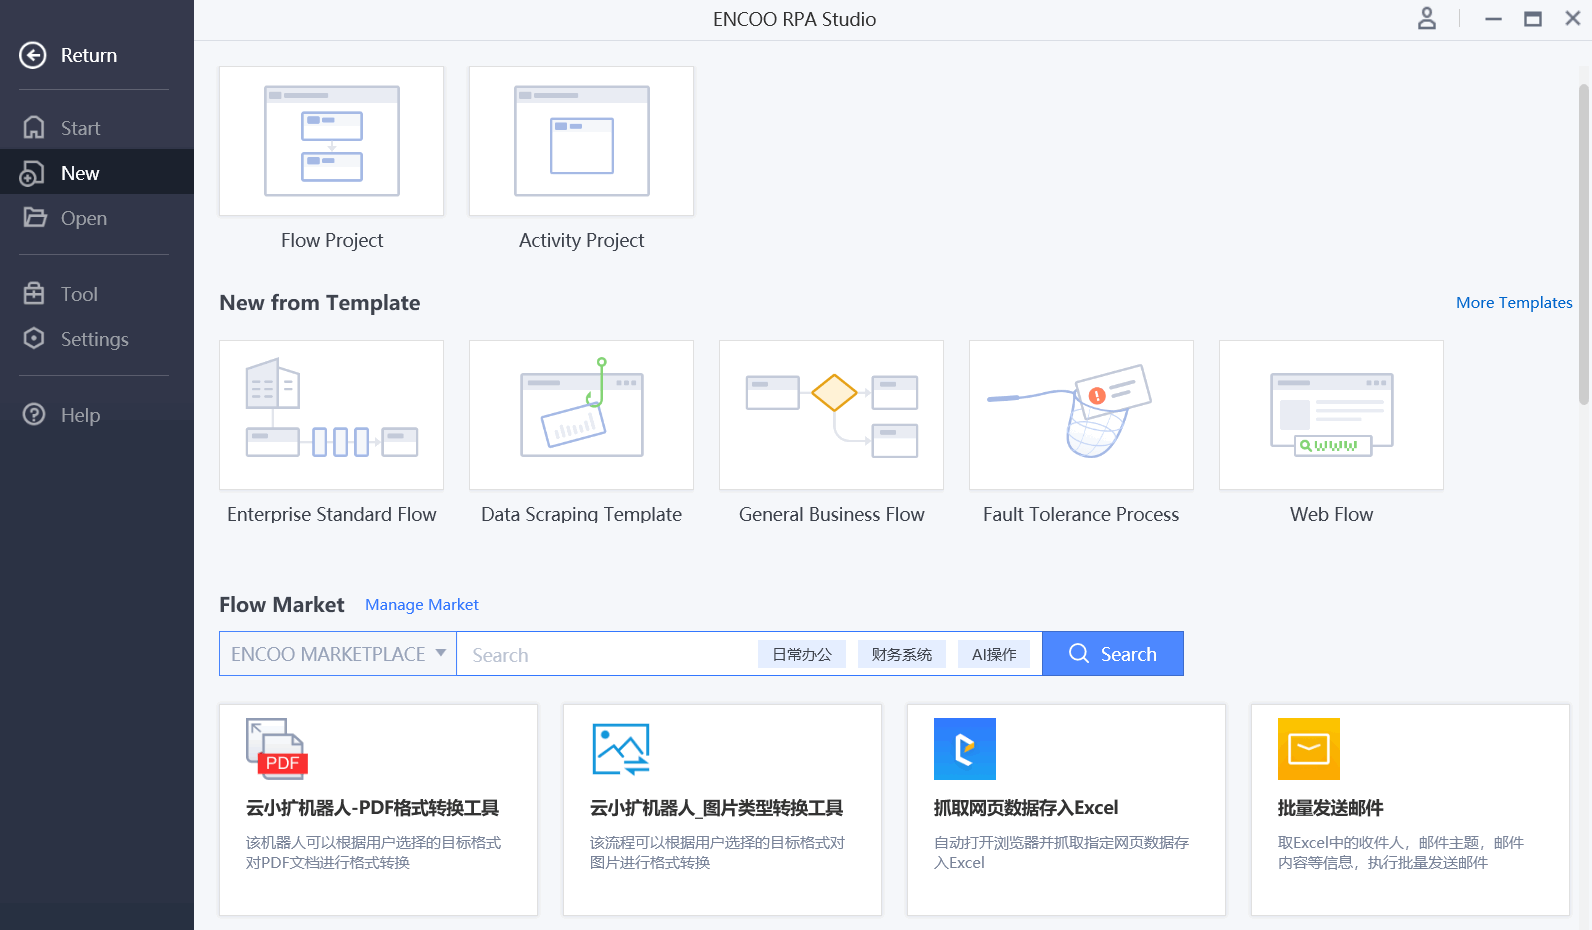
- New - Create a new flow project or activity project.
- New from Template - Start a new project from a predefined template.
- Flow Market - Select and open an existing flow in the flow market to create a new project.
Open
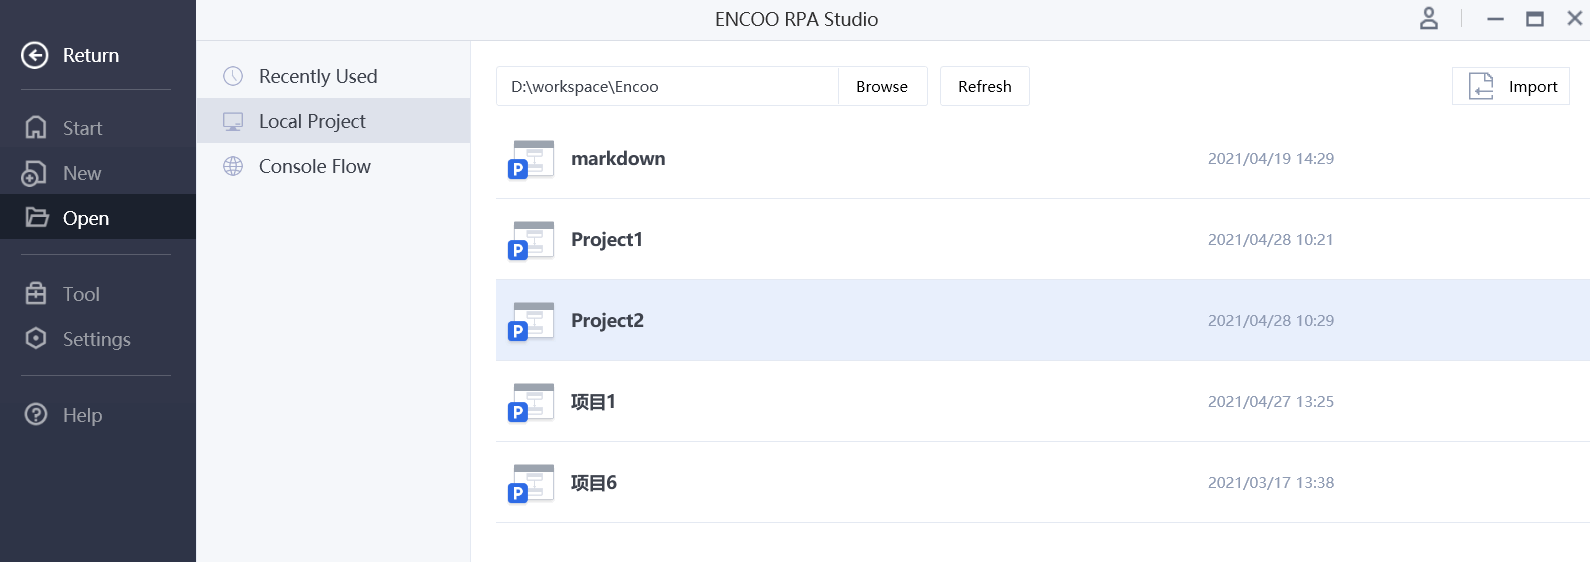
Recent Use - Open the most recent project you have worked on.
Local Projects - Projects that are already on the local computer.
- Browse: Open an existing project on your local computer.
- Refresh: Reload the project folder under the current path.
- Import: Import an existing project from your local computer.
- Console Flow - View/edit the console flow.
Tool
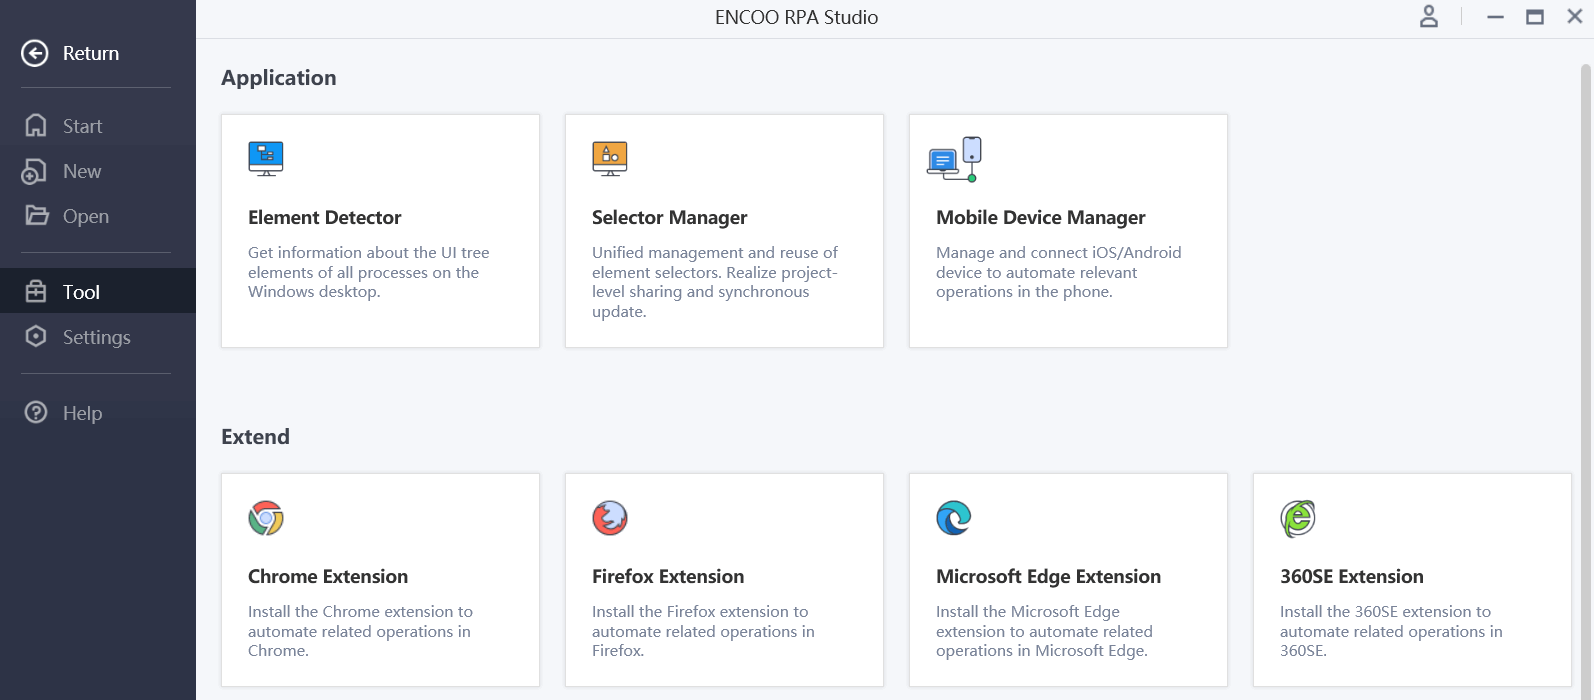
- Applications - The Element Detector application widget is supported.
- Extensions - Various extensions can be quickly installed to automate different applications.
Settings
Settings is used to manage studio-related settings information and find product version information.
- General - Display the studio's language configuration.
- Project - Set up information related to the project.
- "Minimize at Runtime" allows you to set the studio window to be minimized or not at runtime.
- Manage Market - Manage operations on activity market, code market, and flow market, including add, delete, enable/disable, move up/down.
- Shortcut Keys - View all the shortcut keys in your system.
Help
Help can direct you to online courses, product documentation, release notes, online resources, community forums, and official websites. You can also find information about product versions on the Help page.
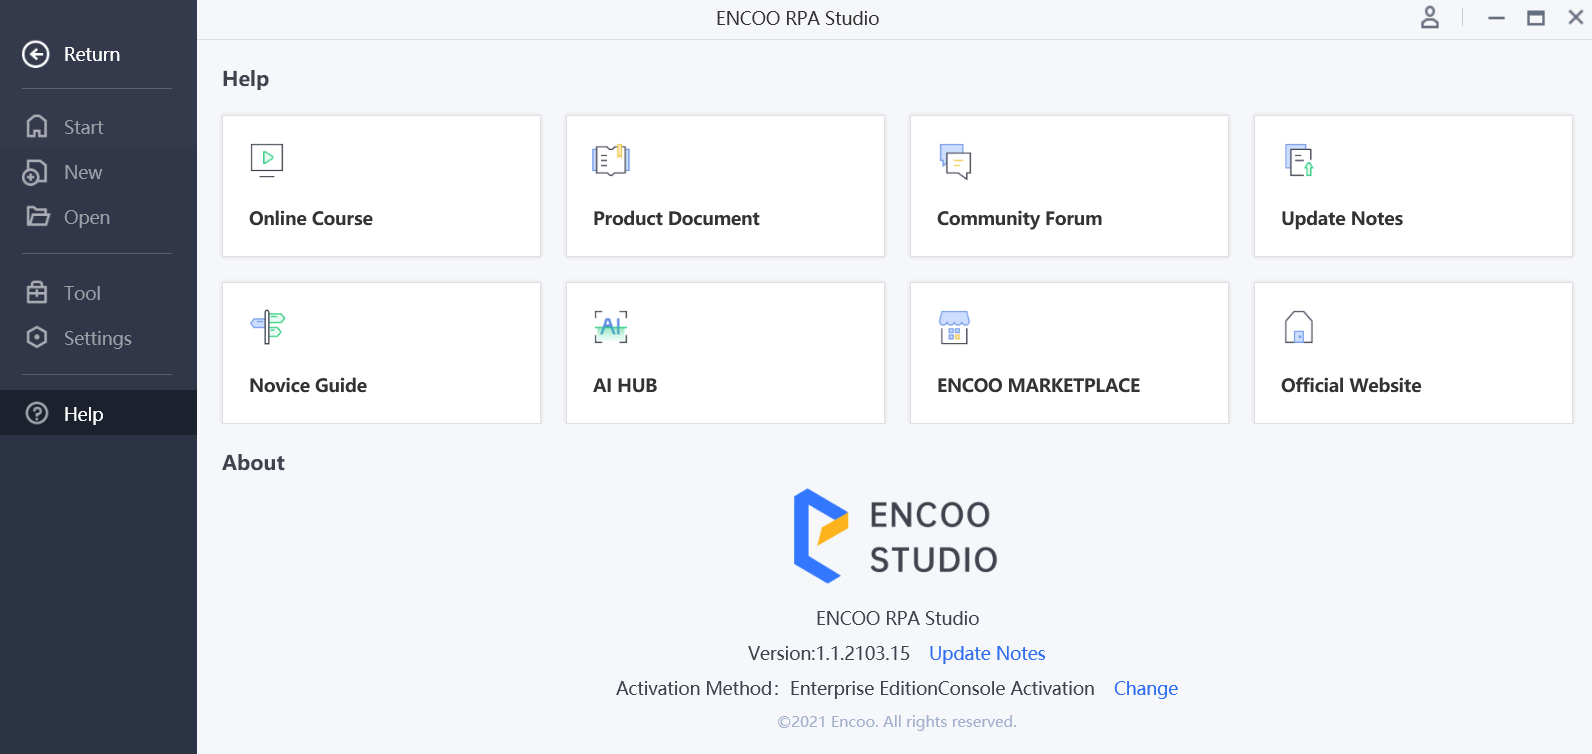
- Update Descriptions: Click the "Update Descriptions" link to view the new or optimized features of the current version of the studio.
- Modify: Click on the "Modify" link to switch the login activation method (Community Edition, Enterprise Edition).
Studio Homepage
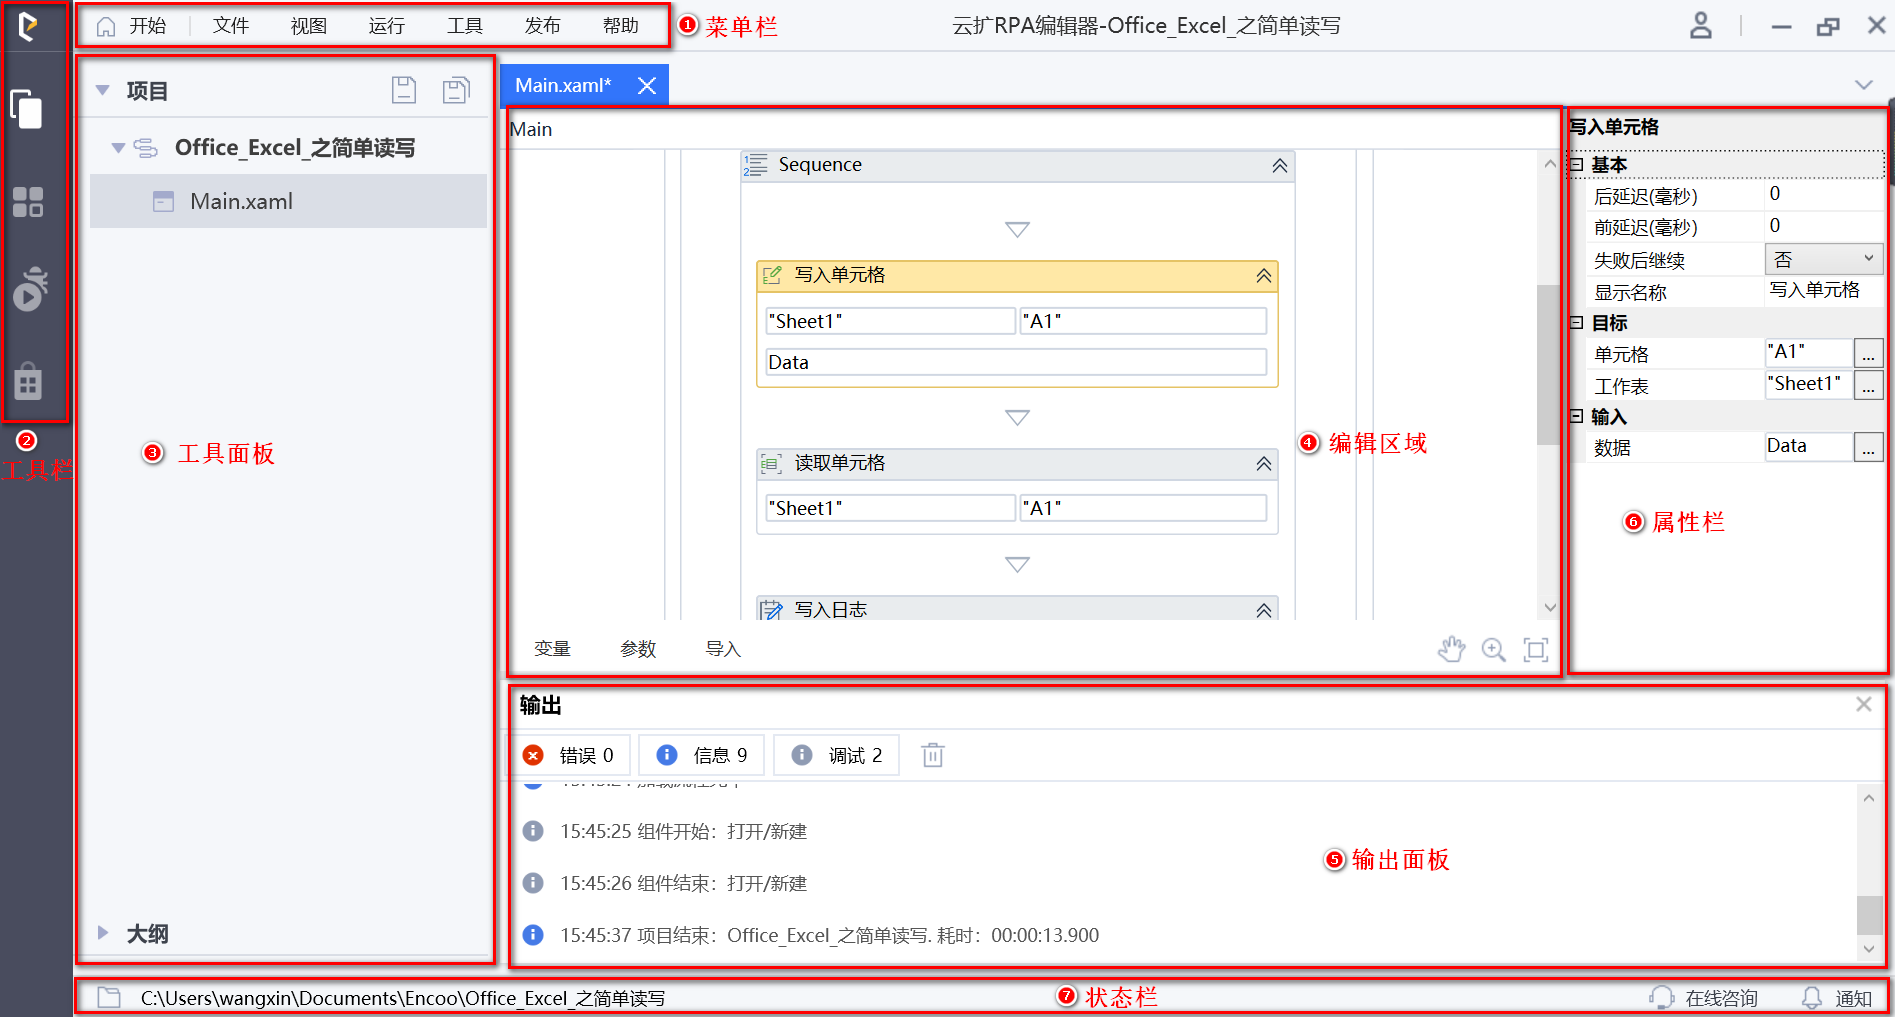
- Menu Bar - A menu of tree structure that can provide access to some functions of the studio.
- Toolbar - Located on the far left side of the studio, it allows you to perform a wide range of activities, including creating and running your automation project and enabling related tools.
- Tools Panel - It gives you access to different panel views such as projects and activities to help you as you work on your project.
- Editing Area - As the main area of the studio, it allows you to edit and modify the automation projects.
- Output Panel - Below the studio, you can open the output panel to output different log messages such as errors, debugging.
- Property Bar - When you select an activity, you can view information about the activity's properties on the right side of the studio.
- Status Bar - It displays information about open projects, studio notifications, etc.
Project Panel
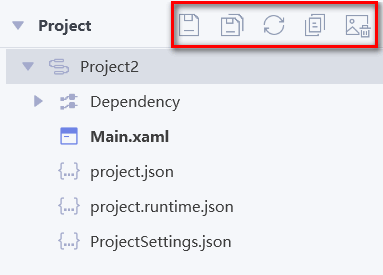
The Project Panel displays the entire contents of the project you have created in a tree structure.
The project panel provides some buttons for you to save the project so as to help you complete the automation flow quickly.
- Save - Save the currently edited flow
- Save All - Save all the edited flows
- Refresh - Refresh the status of the files under the current project
- Show All Files - Show all the files excluded from the project
- Delete Unused Screenshots - Delete unused screenshots from the project
Description:
- A screenshot cannot be deleted from a flow file if there is a backup file of the relevant flow in the Backup folder under the project file.
- If it is a screenshot of a custom file name, it cannot be deleted.
By right-clicking on any file or folder in the projects panel, you can open a context menu containing the following options:
| Option | Description |
|---|---|
| Open | Open a project or file |
| Add | Select the options that can be added under the selected project: Sequence, Flowchart, State Machine, Folder |
| Import File | Import local files to the currently specified folder |
| Rename | It enables you to rename the currently selected file or folder |
| Delete | Delete the selected file or folder |
| Export Project | Export the selected project. After it is exported, a .dgs (flow project) or .egs (activity project) file will be automatically generated |
| Reference Projects | Reference other projects (support folders and files) as dependencies |
| Open Local Folder | Open the local folder of the selected project or file |
| Project Settings | Open Project Settings to set the properties of some category of activity |
| Property | View or edit the property information of the project, including project name, author, and version |
| Debug File | Debug the selected .xaml file |
| Run File | Run the selected .xaml file |
Note:
A master flow file Main.xaml will be automatically created under a project, and the master flow file is not allowed to be renamed
An unlimited number of new sub-flow files can be created under a project (with any file name)
Outline Panel
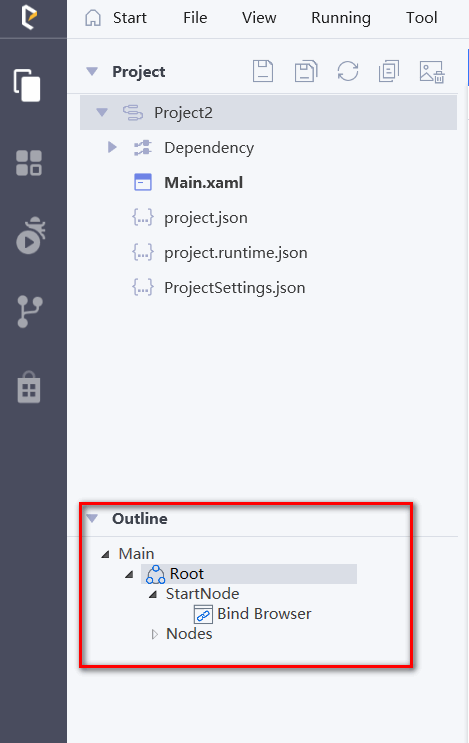
The outline panel is used to display the hierarchical structure of the current flow file. You can locate an activity in the editing area by selecting an activity in the outline, or you can display an activity in the outline by selecting an activity in the editing area.
Activity Panel
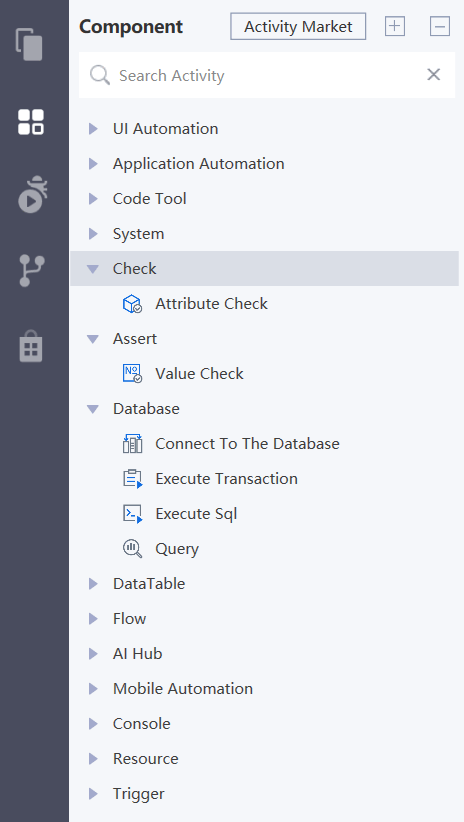
The activity panel mainly displays the activities that need to be used in the automation project. The activities can be dragged and dropped into the editing area with the mouse for use. The activity panel provides a search box for the Quick Find tool, and you can search by entering the activity name.
The F1 shortcut or "Help" in the activity's context menu allows you to quickly open the corresponding activity's help file to learn more about the activity and how to use it.
Run Panel
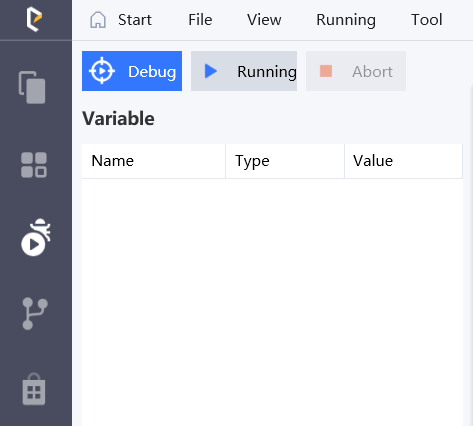
The run panel mainly displays all information related to running and debugging, with relevant buttons with debug and run commands displayed at the top.
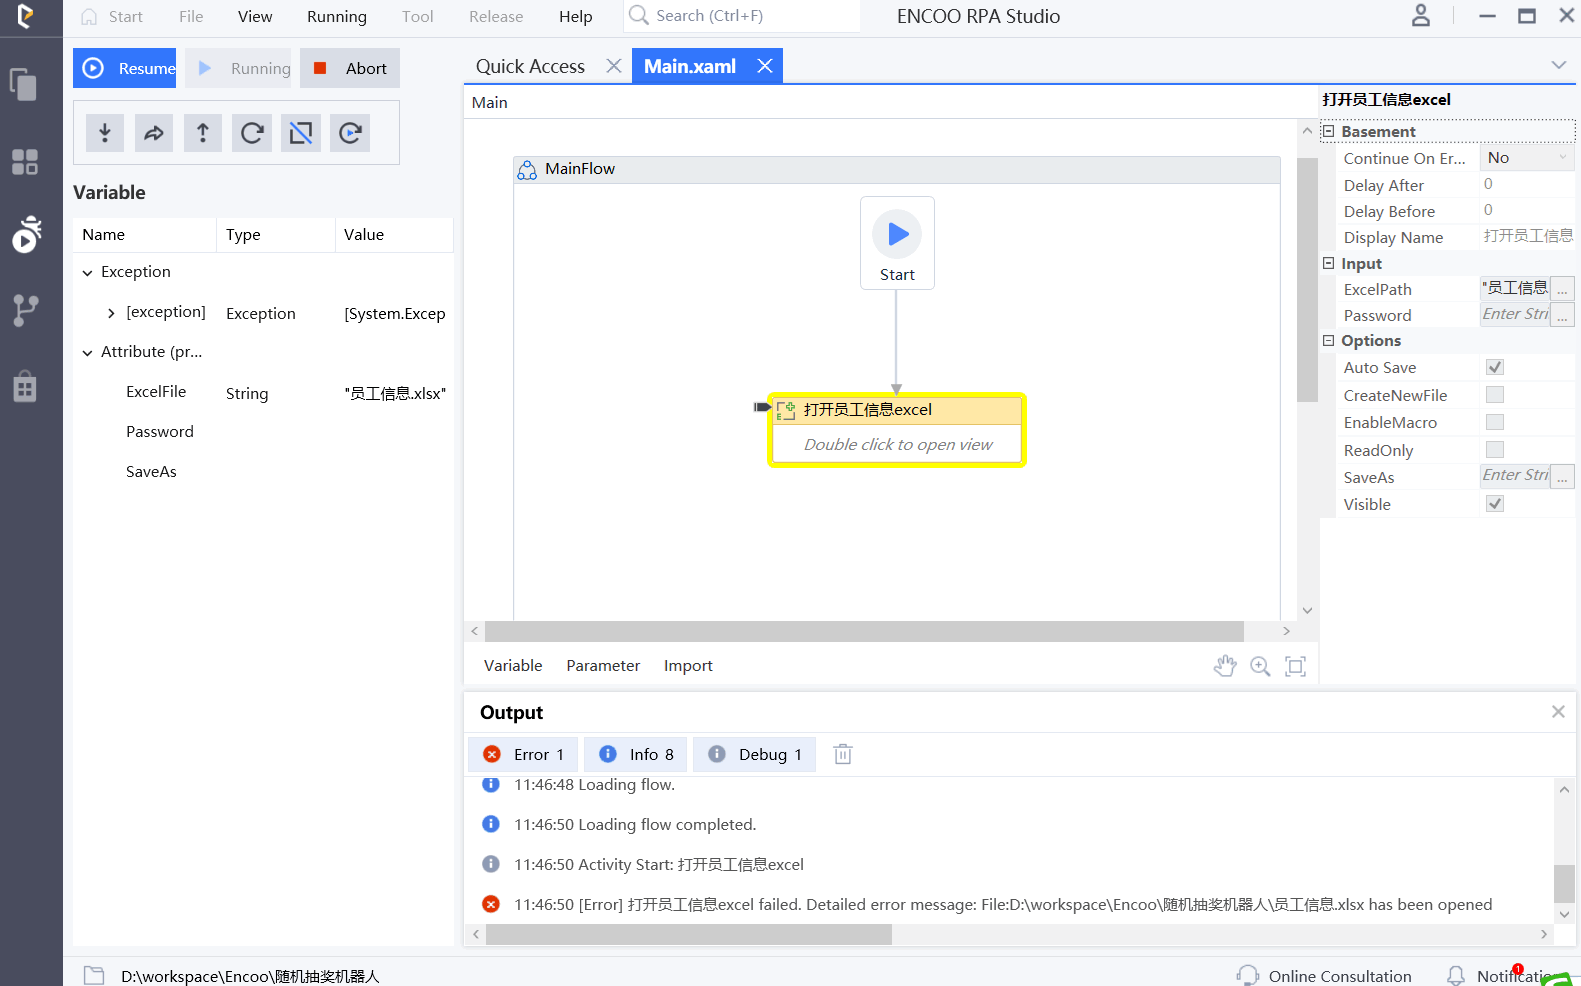
When running an automation project, detailed information about the relevant running process of all the projects will be displayed in the output panel. When an error occurs in the flow, you can easily locate the activity where the error occurs through the log.
Debugging focuses on identifying and clearing errors in a flow by setting breakpoints to improve the flow and improve its correctness. When debugging, both the variable panel and output panel will be opened to display relevant debugging information. For more information on debugging, see Debug.
Version Control Panel
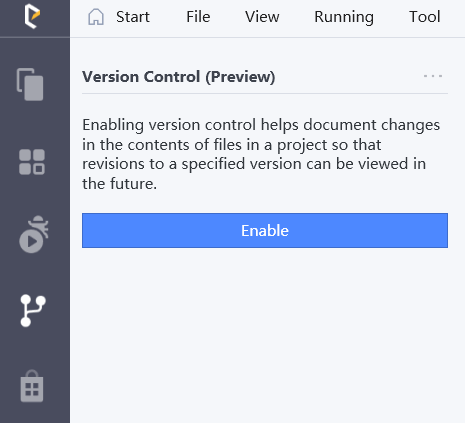
The version control panel is used to record the changes in the contents of files in a project so that revisions to a specified version can be viewed in the future. Click "Enable" to enable version control.
Market Panel
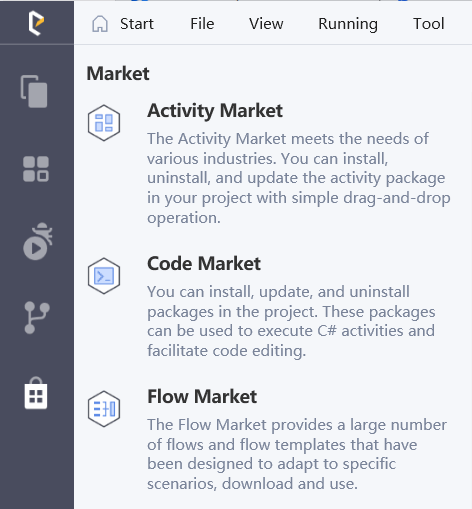
The market panel allows you to open the activity market and the flow market.
Activity Market - It enables you to download and manage third-party activities and add them to your automation project as dependencies.
Code Market - By integrating NuGet, it makes it easier for you to load NuGet packages into your automation project.
Flow Market - You can download flows and have a full understanding of the relevant activities and their applications.
For more information about the market, please see ENCOO Market.
Publish Project
The Publish button in the toolbar allows you to package and publish an automation project for subsequent execution and sharing.
After the automation project is published, it will be automatically stored in the corresponding location. If you want to change the location of the project in the future, you can change it locally and publish it again.
For more information on publishing automation projects, please see Publish Automation Projects.
Personal Information
Open Personal Information by clicking 
Editing Area
The editing area displays the project you are working on and you can make changes to it. The bottom navigation bar in the editing area gives you quick access to variables, parameters, and import namespaces.
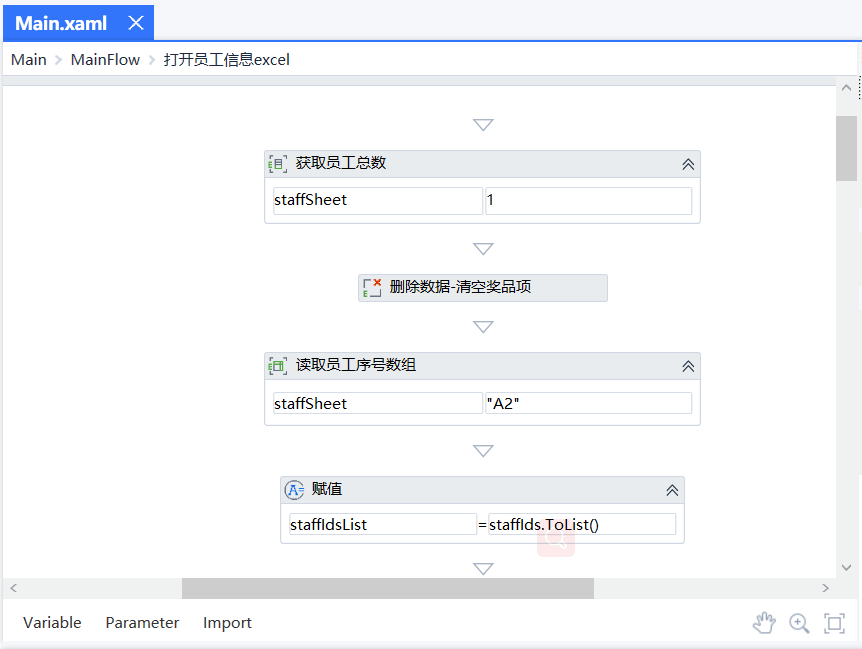
By double-clicking on an activity, you can view the specific contents of the activity and add and change its property.
Activate the pan mode by clicking on the
 icon, holding down the space bar, or pressing the middle mouse button.
Change the zoom level by holding Ctrl and scrolling the mouse wheel, then click the
 to icon to reset it to 100%.
Click on the
 icon to make the entire automation project automatically adapt to the size of the editing area.
Context Menu
The context menu allows you to perform a variety of operations on the current activity such as copy, paste, and delete. You can open the context menu by right-clicking on the current activity range.
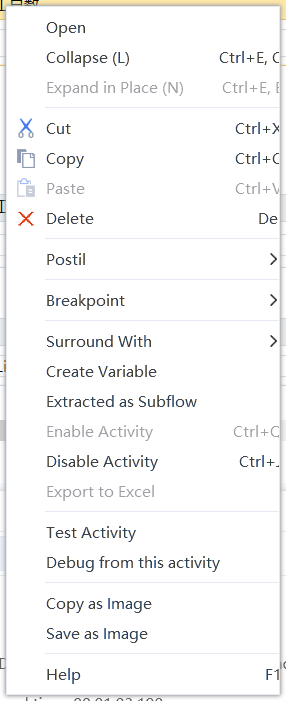
| Options | Description |
|---|---|
| Open | Open the selected activity in the editing area. You can also achieve it by double-clicking on it. |
| Cut | Delete the selected activity and place it on the clipboard. |
| Copy | Copy the selected activity and place it on the clipboard. |
| Paste | Insert the activity on the clipboard to the current position. |
| Delete | Delete the selected activity. |
| Postil | Add, edit, delete, display, and hide comments on the activity. |
| Breakpoint | Insert, delete, disable, and enable the breakpoints of the selected activity. |
| Included in Error Catching | Include the selected individual activity in the Try module with an error-catching activity. |
| Create Variable | Create variables in the variable list. |
| Extracted as Subflow | Create a new flow that contains the target activity. Reduce the complexity of viewing the project by breaking down a large flow. A call flow activity is automatically generated at the activity extracted as a subflow, with parameters automatically generated by the variables used in the activity. |
| Enable Activity | Enable the activities that are previously disabled. |
| Disable Activity | Disable the selected activity and place it in the Comment Out container |
| Export to Excel | Right-click on a blank space in an activity in the container (flowchart/sequence/state machine group) to export the xaml file contents to Excel. |
| Debug Activity | Debug only the selected individual activity. |
| Debug from this Activity | Start the debugging flow from the selected activity. |
| Copy as Image | Save the content displayed in the editing area as an image, and the default name, type, and storage path of the image are used. |
| Save as Image | Save the content displayed in the editing area as an image, but the name, type, and storage path of the image can be customized. |
| Show All Conditions | Show the value of the Condition property of the flow decision activity in the flow editing area. |
| Hide All Conditions | Hide the value of the Condition property of the flow decision activity in the flow editing area. |
| Help | Quickly open the help file of the corresponding activity to learn more about the activity and how to use it. It can also be done by using the shortcut F1. |
| Set as Start Node | Set the currently selected activity as the start node, and the flow execution starts from the current activity. Note: It is only displayed when the current container activity is a flowchart. |
| View Parent | Display the parent of the currently selected activity in the editing area. Note: It is only displayed in the context menu of sub-level activities. |
Properties Panel
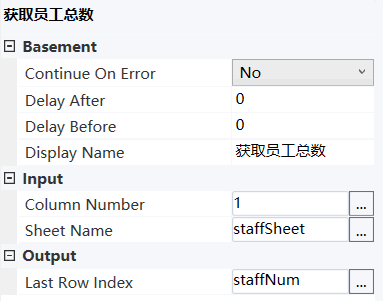
The properties panel is presented inside the editing area. It displays the relevant properties of the current activity. You can set the properties related to the current activity through the properties panel.
Note:
When entering the property value, if the property value is a string, you need to put the string in English double quotes.
Output Panel
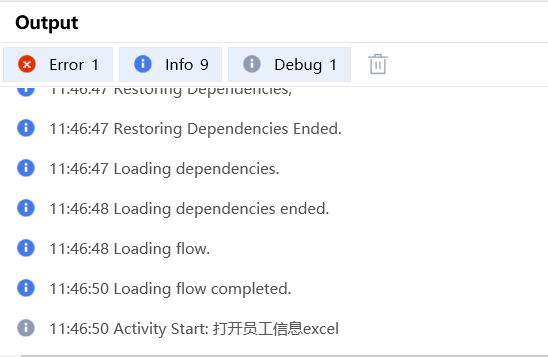
The output panel can display all information in the current project, including but not limited to information when the project is opened or executed and output information written to the log activity. The output panel allows you to quickly locate where errors occur in your project and make changes in time to ensure the correctness of your project.
In the output panel, you can show or hide messages at different logging levels, such as error, message, debug, by clicking different buttons in the panel title bar. By right-clicking on a message, you can copy the message to the pasteboard.
When there is a problem with project validation, an error message will be displayed in the output panel. For debugging projects, the output panel will display a detailed log of all activities from start to complete. When an error occurs in the flow, log messages will make it easy to locate the activity where the error occurs.
Please note that the log information stored in this panel will be cleared automatically each time you run or debug the project.
Quick Access Page
When you open a project, the system shall open the "Quick Access" menu by default. This page allows you to quickly open flow files, quickly record and debug, and quickly open useful links.
Description:
If you do not want this page to open when you open a project, you can set the option "Show quick access page when opening a project" to be unchecked in "Start > Settings > Projects".
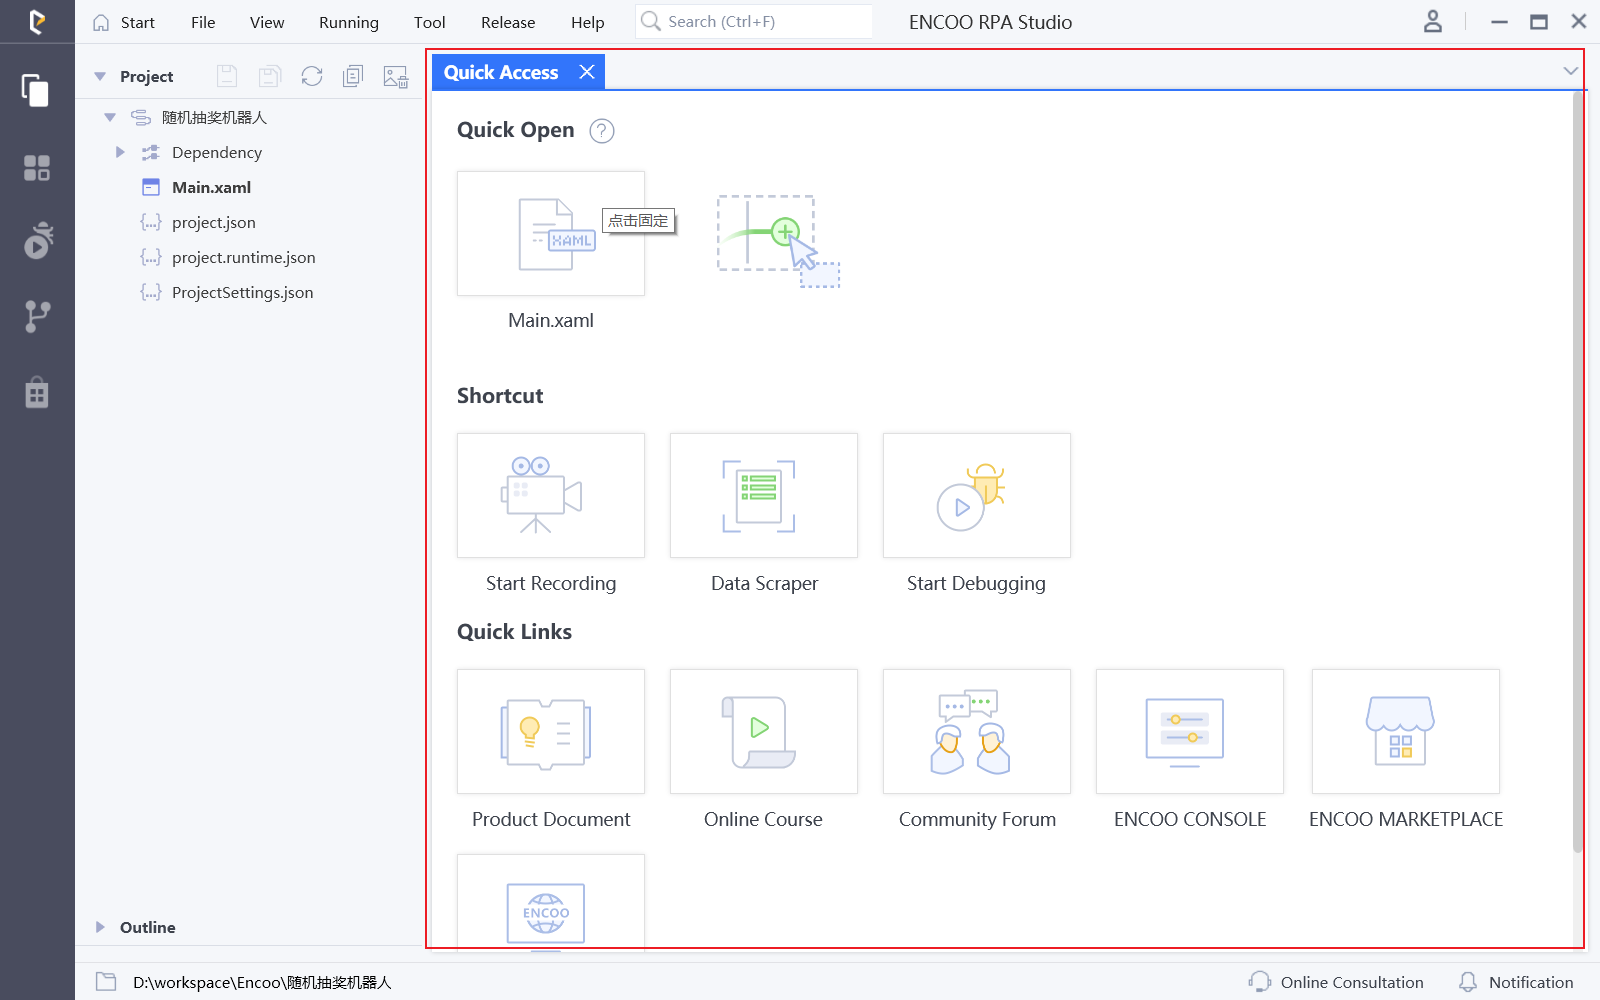
- Quick Open: Drag and drop the flow file (xaml type) you want to open quickly from the project panel to the "Add File" area. Click on the file to open it quickly.
Description:
Up to five files can be added to the "Add Files" area for quick opening.
Shortcut
Start Recording: When you click "Start Recording", Smart Recorder can be opened to record without opening the flow file. Save the recording result to the flow file of the new sequence type after recording.
Start Debugging: When you click "Start Debugging", debugging is performed from the Main.xaml entry file of the flow project.
Description:
This feature is not supported when the project type is "Activity Project".
Useful Links: It allows you to quickly open links to product documentation, online courses, community forums, ENCOO RPA Console, ENCOO Market, and ENCOO official website.
Feedback
Feedback allows you to seek help quickly. You can click on the  icon to open the feedback window.
When our customer service staff is online, you can tell your problem to the customer service staff, and the customer service staff will help you solve the problem in a timely manner. When the customer service staff is not online, you can also leave a message to let us know your problem.

